Giving your front yard a major facelift doesn’t mean you have to drain your bank account or spend your weekends doing backbreaking labor. With a few clever ideas and some basic materials, you can completely redefine the look and feel of your home’s entrance.
You can seriously elevate your home’s curb appeal with creative, budget-friendly landscaping solutions that look both beautiful and intentional.
Sometimes, the smallest details make the biggest impact. A simple winding path, a strategic burst of color, or a unique planter can transform your front yard into a warm, inviting space.
You’ll be amazed how a few simple adjustments can bring a smile to your face every time you pull into the driveway.
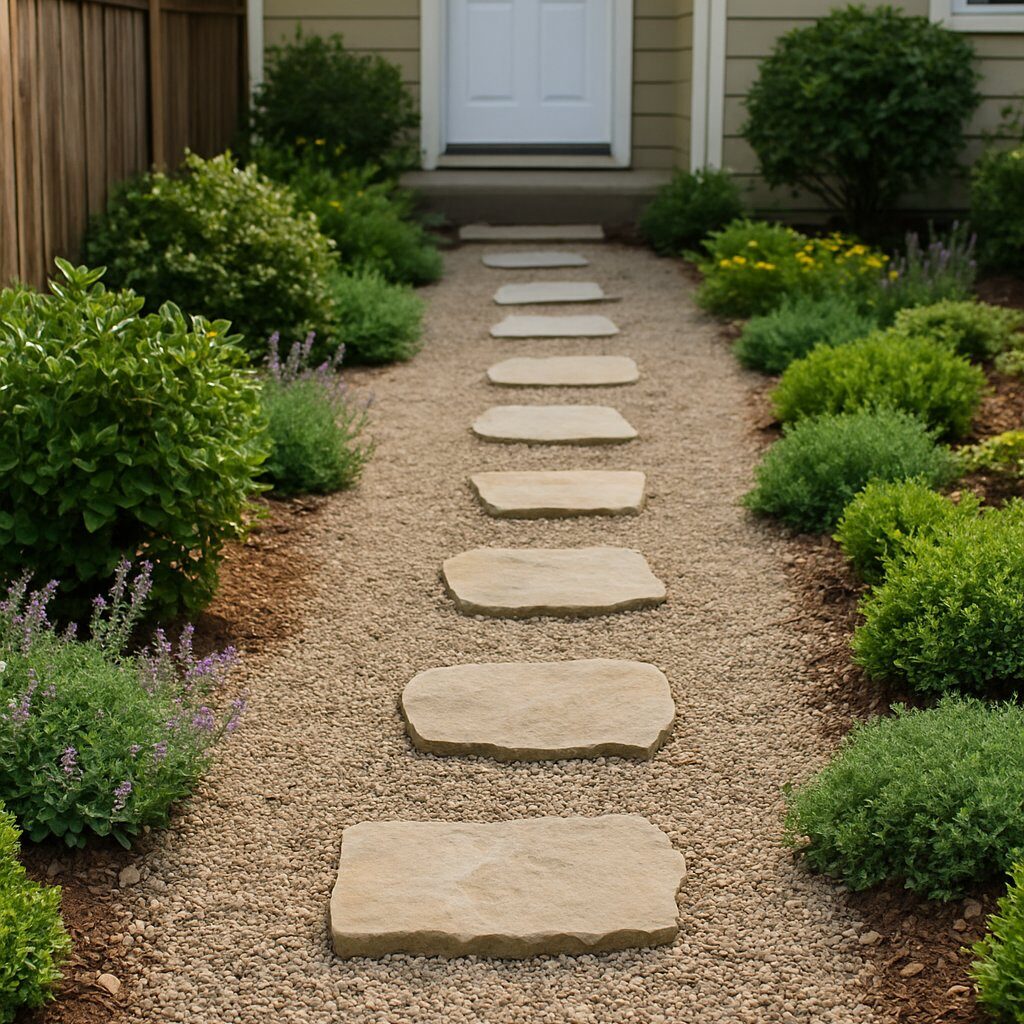
1. Create a gravel pathway with stepping stones for a charming, low-cost entrance.
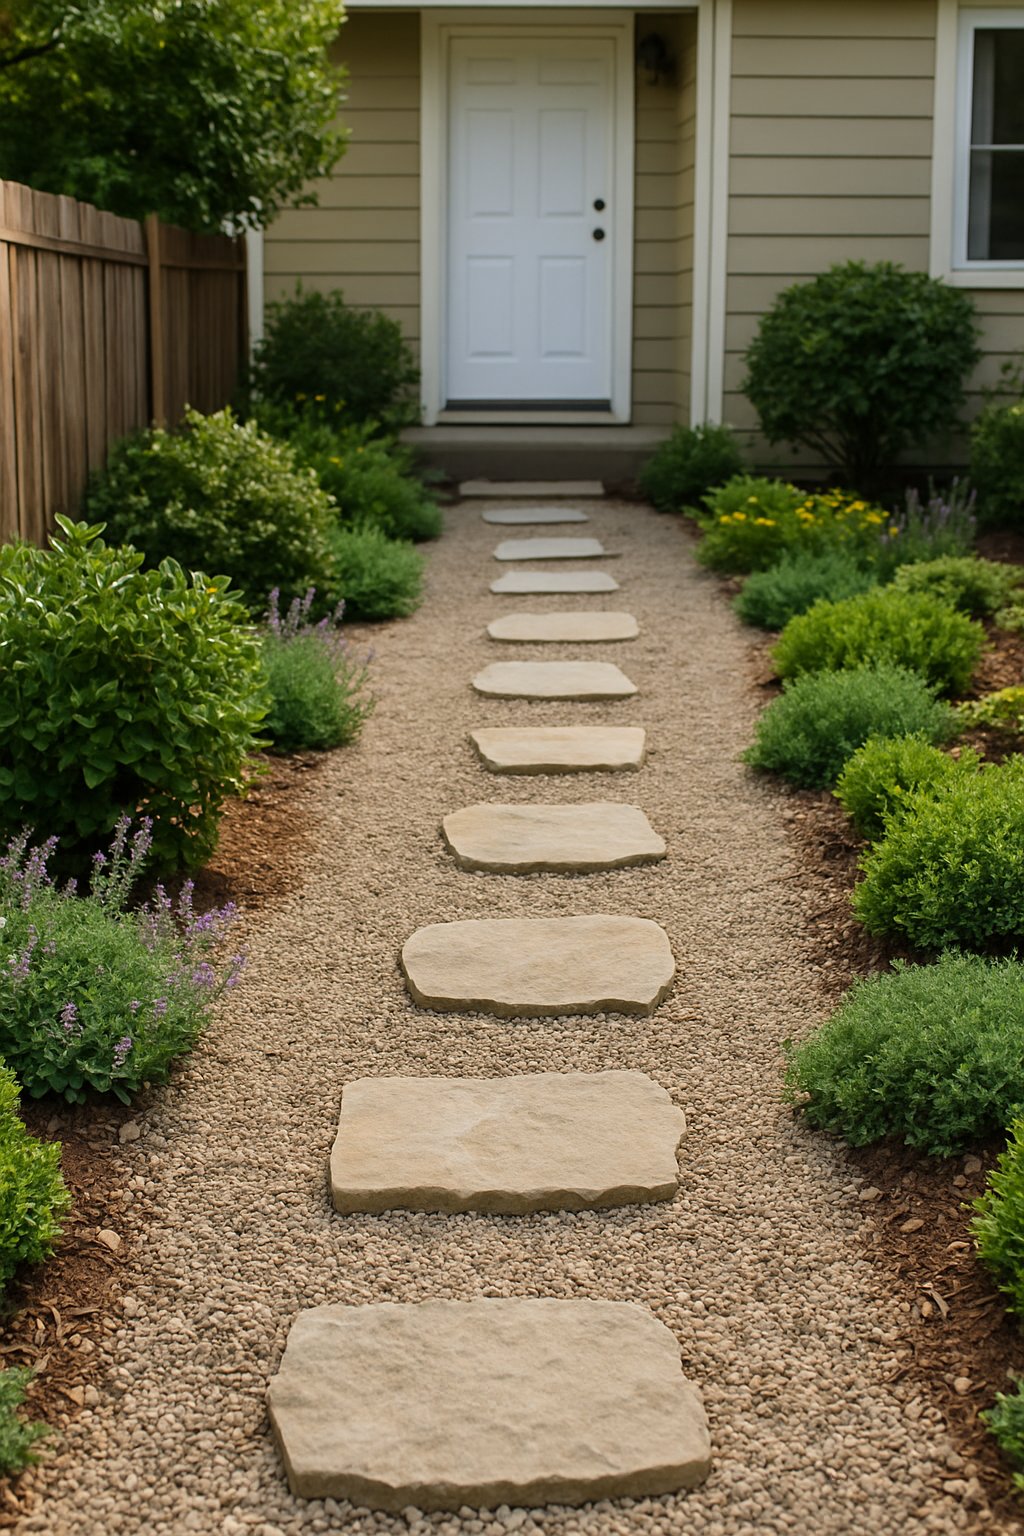
Thinking a sophisticated walkway is out of your price range? Think again. A gravel path punctuated with stepping stones offers a timeless look that is both durable and incredibly affordable.
Start by mapping out your desired path, perhaps from the driveway to your front door. Laying down a layer of gravel provides a clean surface and effectively eliminates mud problems.
Position stepping stones to give visitors a comfortable and stable place to walk. You can use a variety of materials, from natural stone and concrete to repurposed pavers you might already have.
For an extra touch of charm, line the pathway with small plants or colorful flowers. This creates an inviting entrance without a hefty price tag.
Expert Tip: Position your stepping stones before spreading the gravel, which allows you to perfect the spacing. A border made of bricks or metal edging will keep the gravel neatly in place.
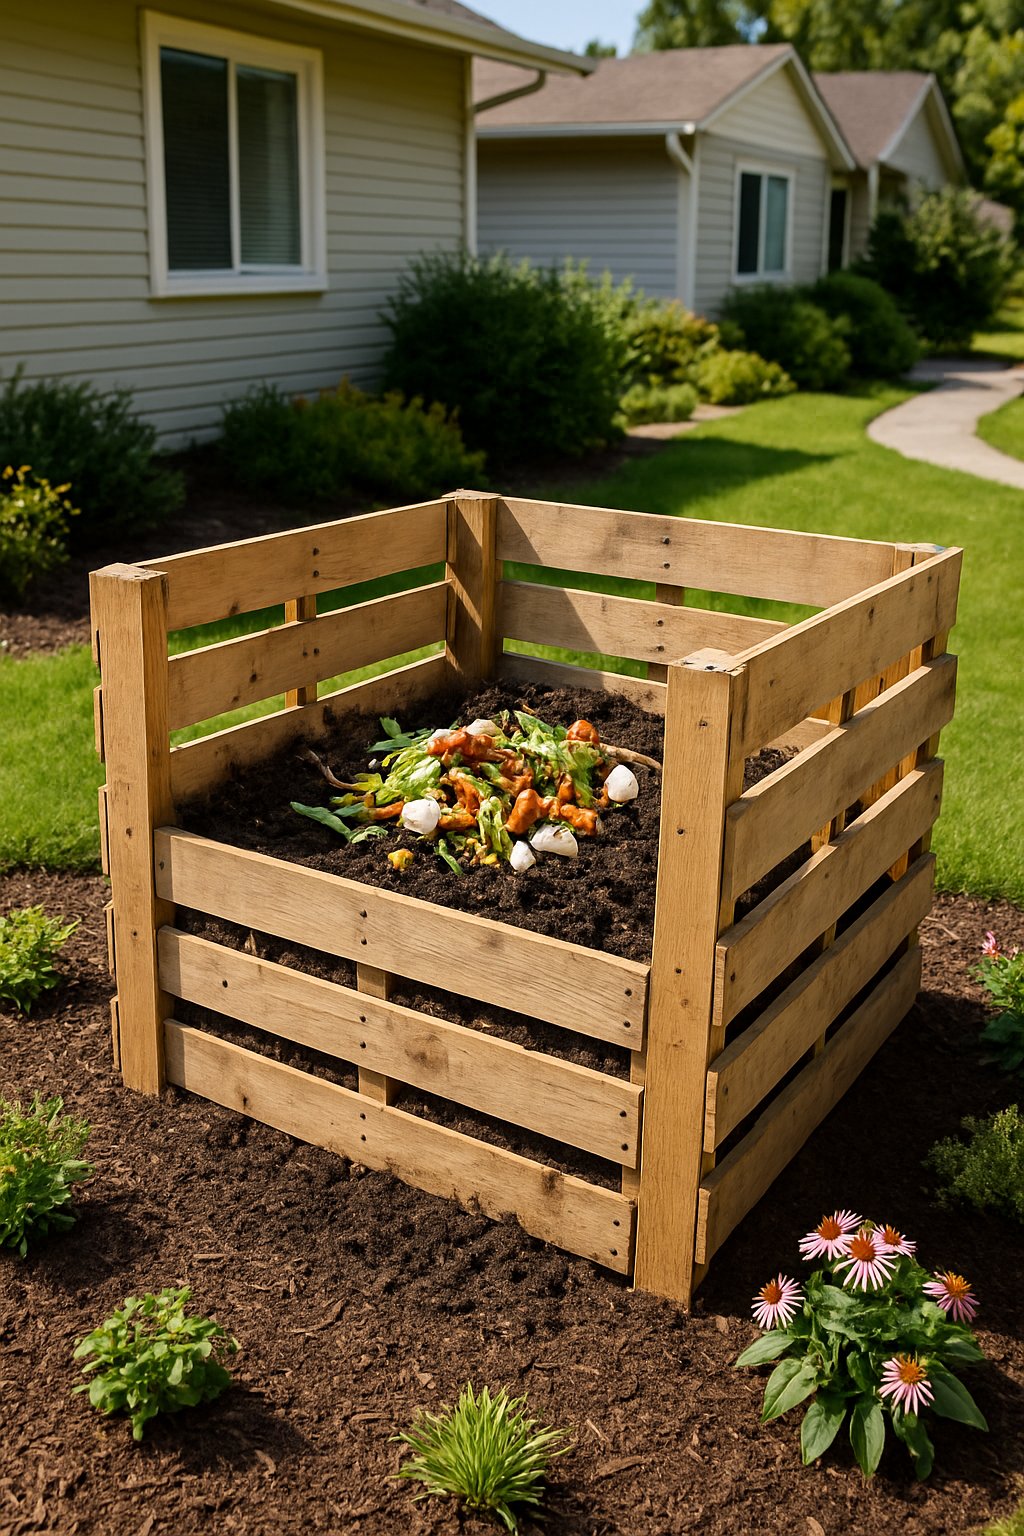
2. Use recycled wooden pallets as raised garden beds to grow flowers or veggies.
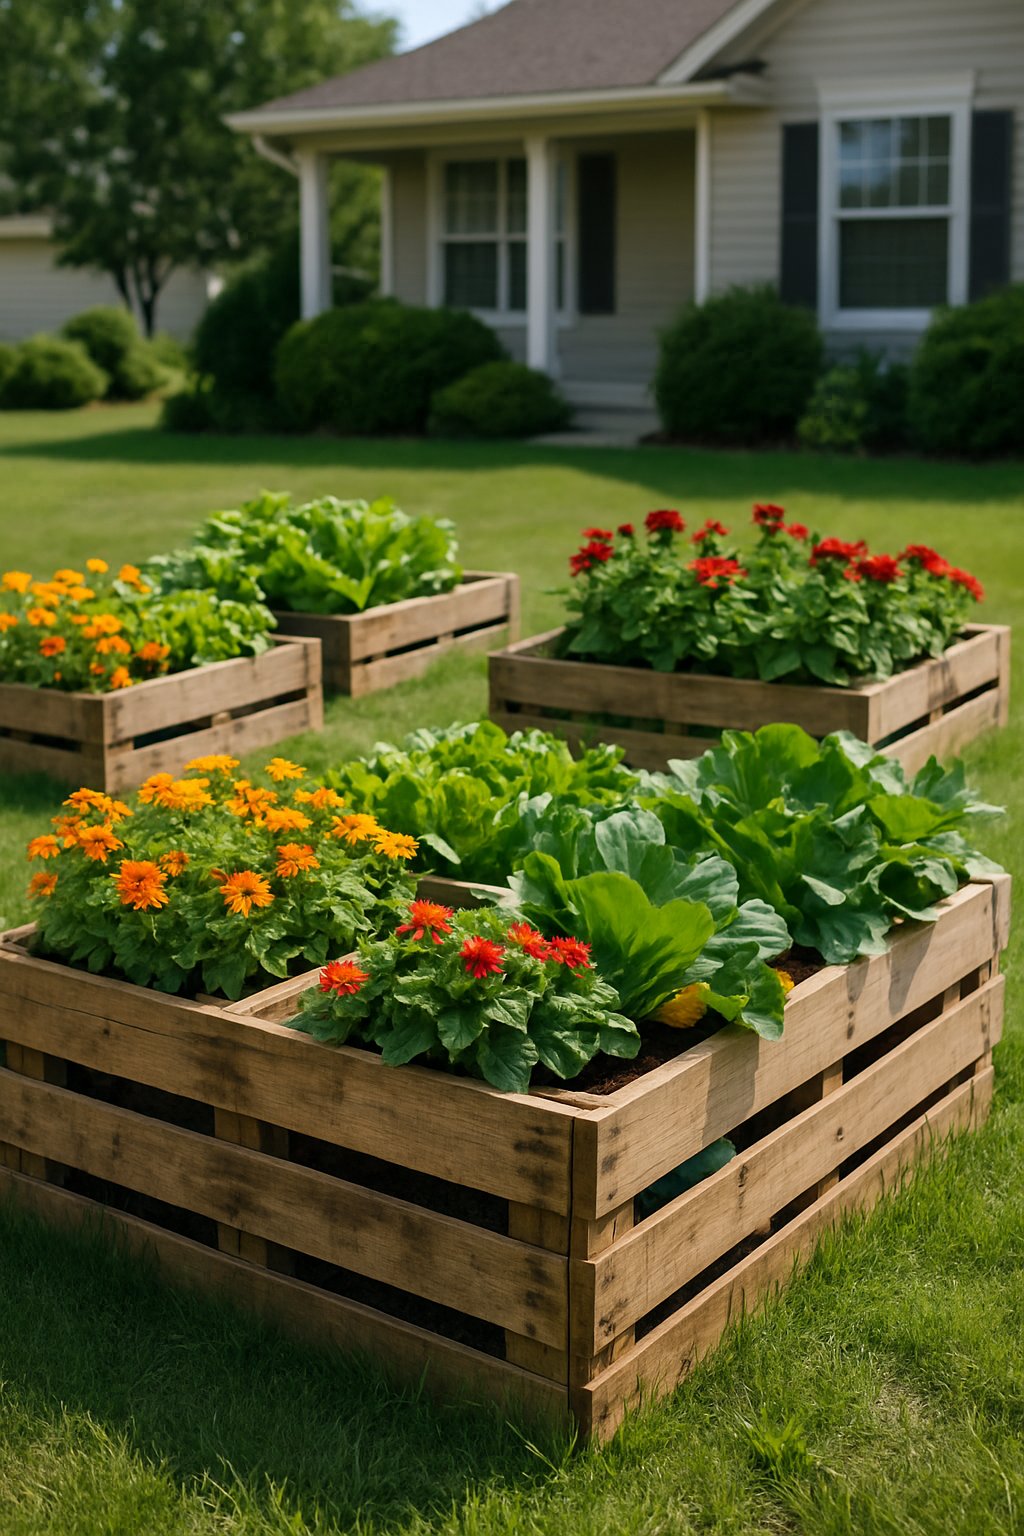
Wooden pallets are more versatile than you think. With a bit of work, you can transform them into practical raised garden beds for very little money.
Raised beds offer a tidy way to organize your plants and reduce the strain on your back from constant bending. You’ll also benefit from fewer weeds and improved soil drainage, giving your yard a clean, structured appearance.
You can grow vibrant flowers to brighten the space or plant a few vegetables to enjoy at mealtime. The sturdy wood used in most pallets ensures your garden beds will last for several seasons.
Just make sure the pallet wood is free of harmful chemical treatments. A quick sanding and a coat of non-toxic sealant will have them ready for planting.
Expert Tip: Search for pallets marked with an “HT” stamp, which indicates they were heat-treated rather than chemically treated. Place your new beds in a sunny location to ensure your plants thrive.
3. Plant native drought-resistant plants to save water and maintenance time.
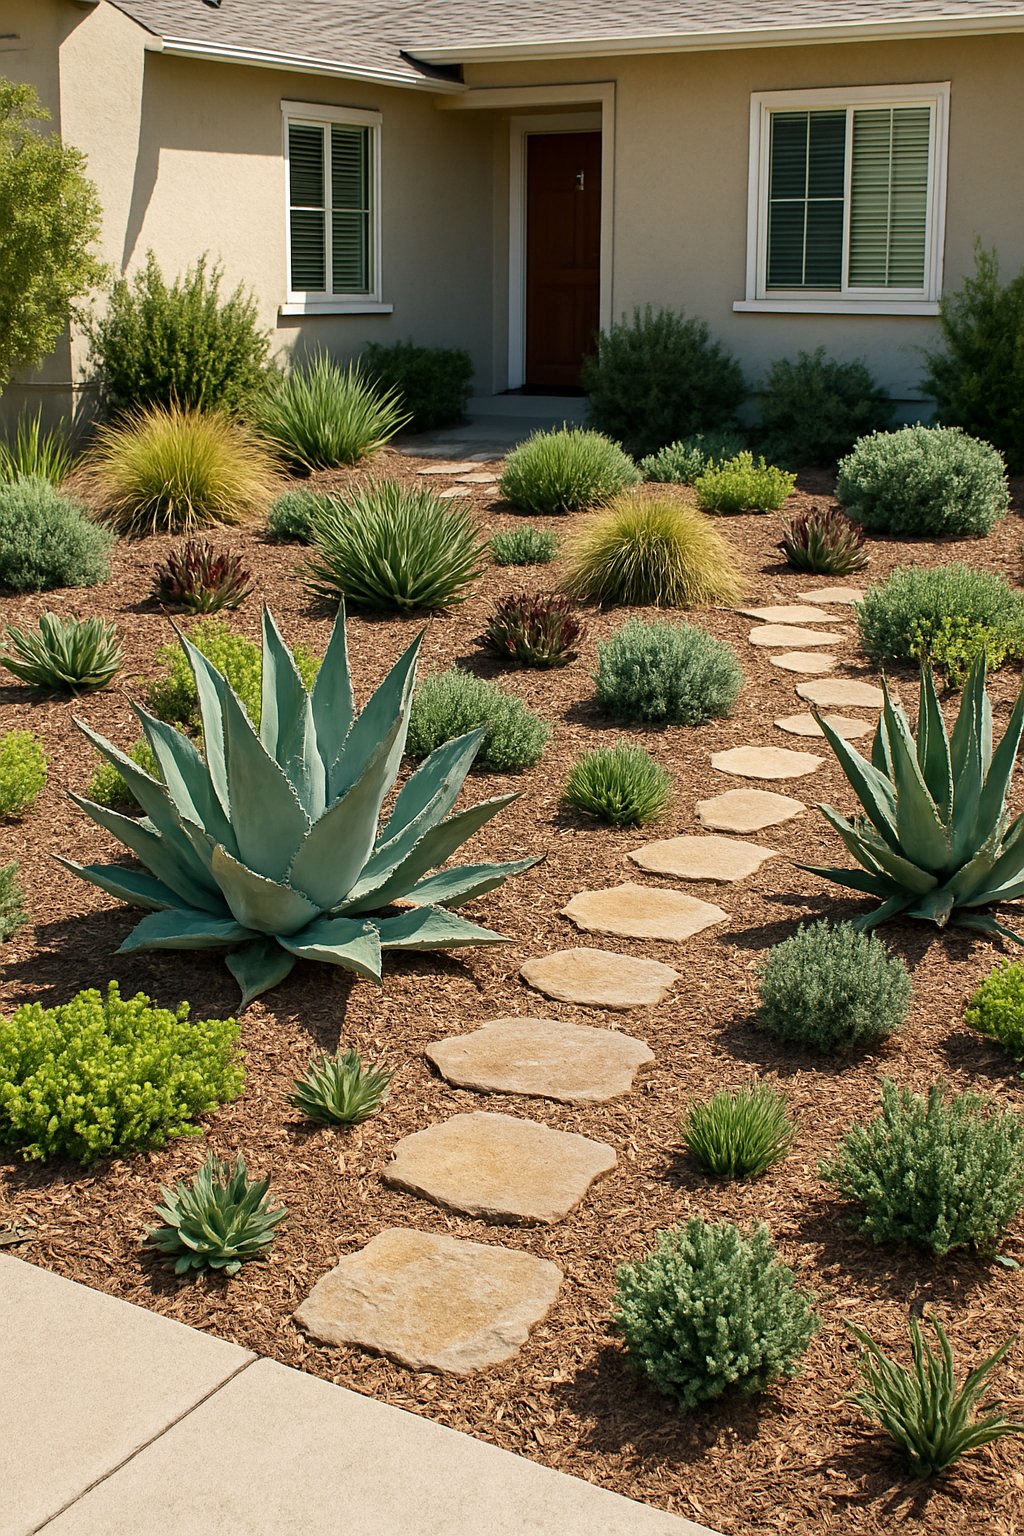
You don’t need a constant watering schedule to maintain a lush, green yard. Choosing native, drought-resistant plants ensures your landscape can withstand dry periods while still looking fantastic.
Because these plants are already adapted to your local climate, they require minimal intervention. This means less time spent on yard work and lower water bills.
They also rarely need pruning or fertilizing. This low-maintenance approach gives you more free time and attracts local wildlife like birds and bees to your garden.
Expert Tip: Focus on plants that are indigenous to your region. They will establish themselves more quickly and demand less of your attention over time.
4. Add a DIY mulch bed around trees and shrubs to keep soil moist and neat.
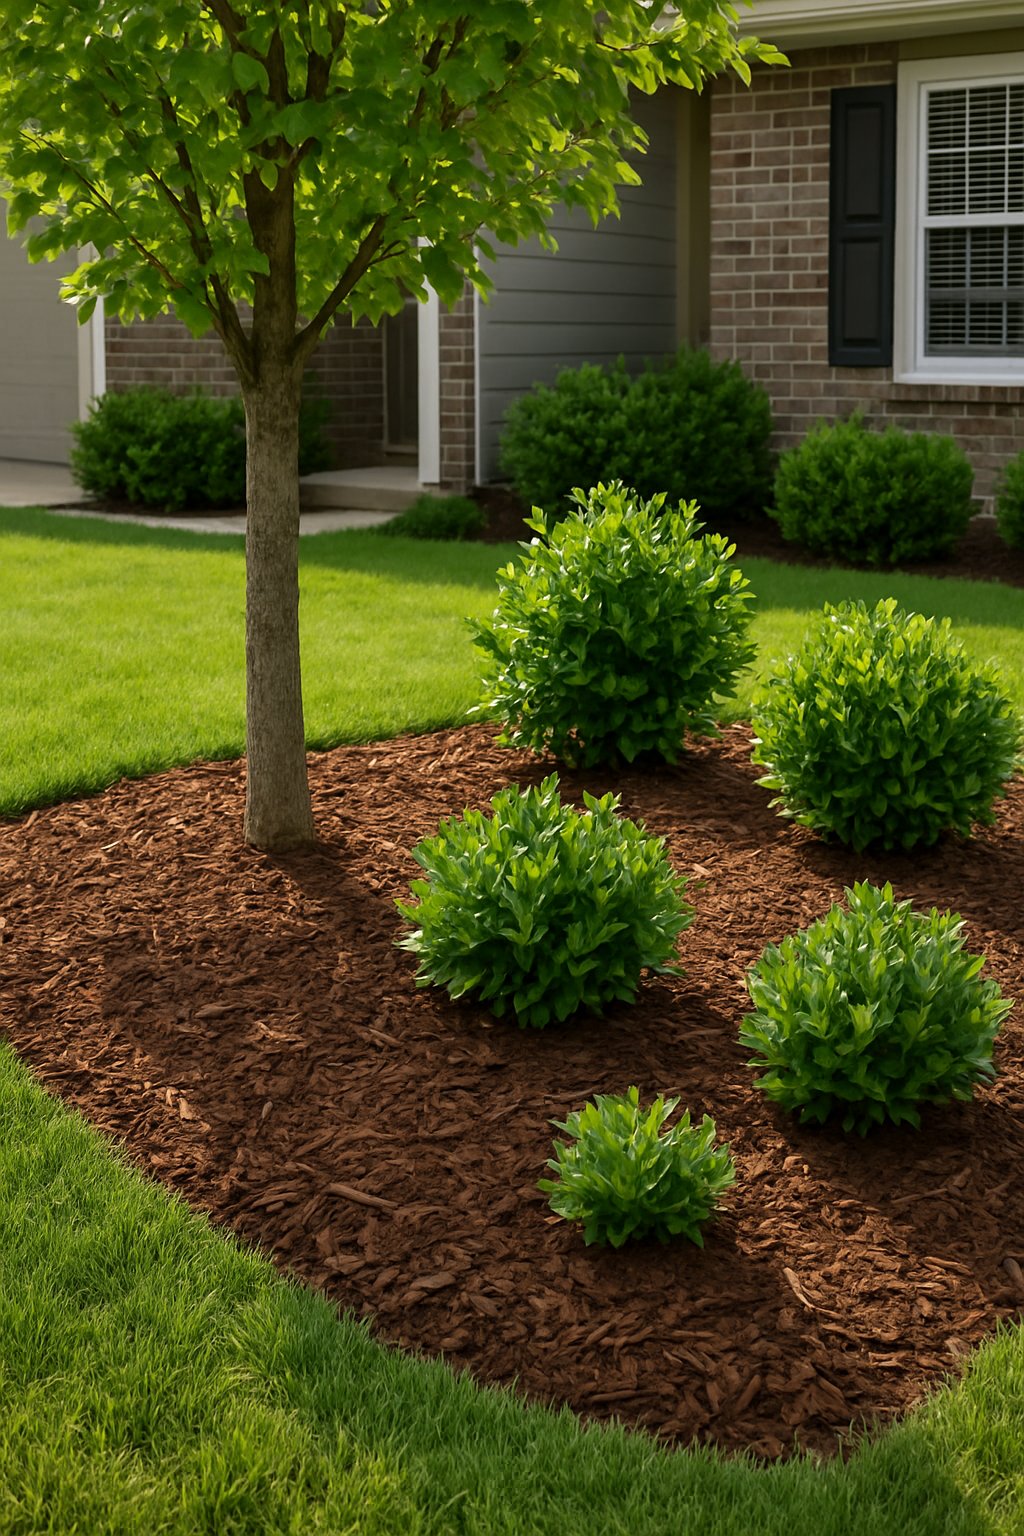
Mulch does more than just look good; it’s a silent helper for your plants. Creating a simple mulch bed is a great way to maintain a tidy appearance while protecting your trees and shrubs.
Before you begin, clear away any grass and weeds from the base of the plants. This prevents competition for water and nutrients.
Apply a layer of mulch about two to three inches deep, making sure to avoid piling it directly against the trunk, which can cause problems.
Mulch is excellent at helping the soil retain moisture, reducing your need to water. It also helps regulate soil temperature, creating a stable environment your plants will appreciate.
Expert Tip: Natural mulches like bark or wood chips are ideal. They decompose slowly, enriching the soil and providing a little extra nourishment for your plants.
5. Repurpose old tires as colorful planters for a quirky front yard vibe
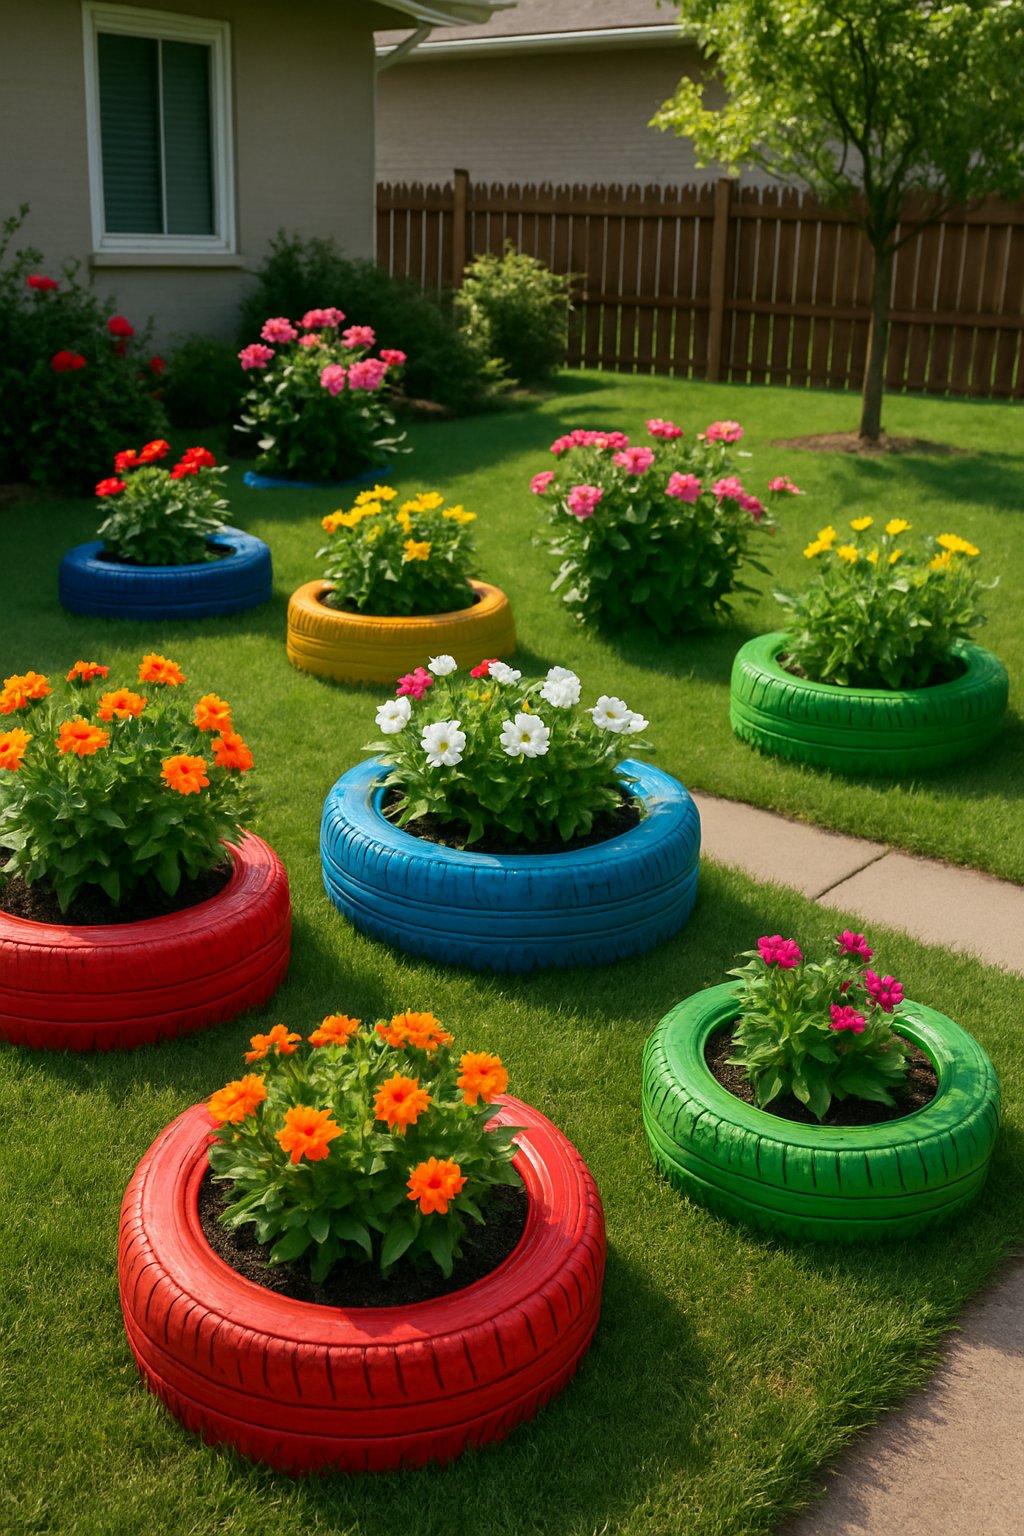
Don’t send old tires to the dump when they can become fantastic planters. After a thorough cleaning and a fresh coat of paint, you’ll have unique pieces of garden art.
You can stack them, hang them from a fence, or simply arrange them on the ground. Fill them with soil and plant your favorite flowers or herbs. The circular shape makes the foliage stand out beautifully.
Paint each tire a different bright color for a fun, playful effect. You can coordinate with your house’s color scheme or choose a wild palette. It’s a fantastic way to inject personality into your yard on a dime.
Expert Tip: Choose an outdoor paint to prevent the colors from fading. For the best finish, be sure to wash the tires thoroughly before you start painting.
6. Install solar-powered garden lights to brighten your walkway without electric bills.

A beautifully lit walkway is achievable on any budget. Solar garden lights are an inexpensive and easy solution that won’t add a penny to your electricity bill.
Simply stake them into the ground in a spot that receives plenty of sunlight. As evening falls, they automatically turn on, casting a magical glow along your path.
These lights help guide guests to your door and highlight your beautiful plants at night. Best of all, there are no wires to run or electricians to call.
You can begin with a small set and easily add more later. Even affordable models can be quite durable if you select ones designed to withstand the elements.
Expert Tip: Place the lights where they will get at least six hours of direct sunlight. A quick wipe of the solar panels now and then will keep them charging efficiently.
7. Build a simple birdbath using a shallow bowl and a sturdy pedestal.
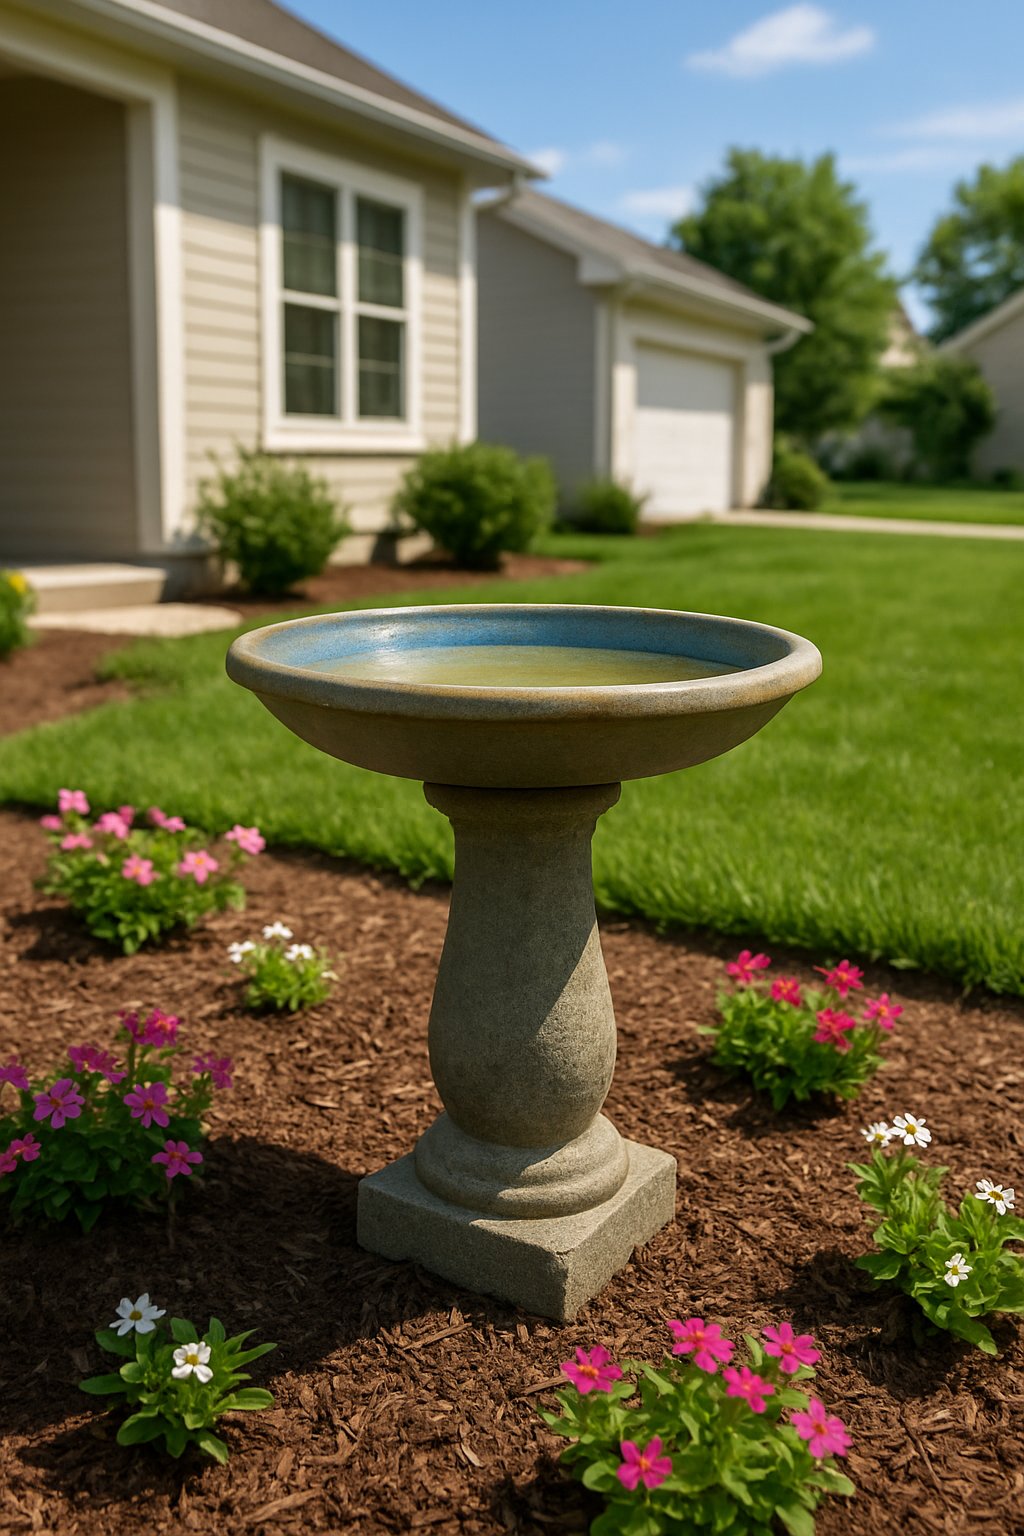
You can create a charming birdbath without buying a fancy, expensive one. It’s a quick project using items you might already have around the house.
Find a wide, shallow dish. Ceramic, metal, or even a unique find from a thrift store will work perfectly. Birds prefer shallow water, so aim for a depth of less than two inches.
Place the bowl on a stable base, such as a plant stand, an overturned flowerpot, or even a neat stack of bricks. Just ensure it is secure and won’t tip over.
Add a few small stones inside the bowl to give birds a place to perch. Fill it with water and set it up where you can enjoy watching your feathered visitors.
Expert Tip: “Clean out your birdbath every couple of days to keep the water fresh. Birds are drawn to clean water, so you’ll attract more of them.”
8. Use river rocks to edge flower beds for a natural, polished look.
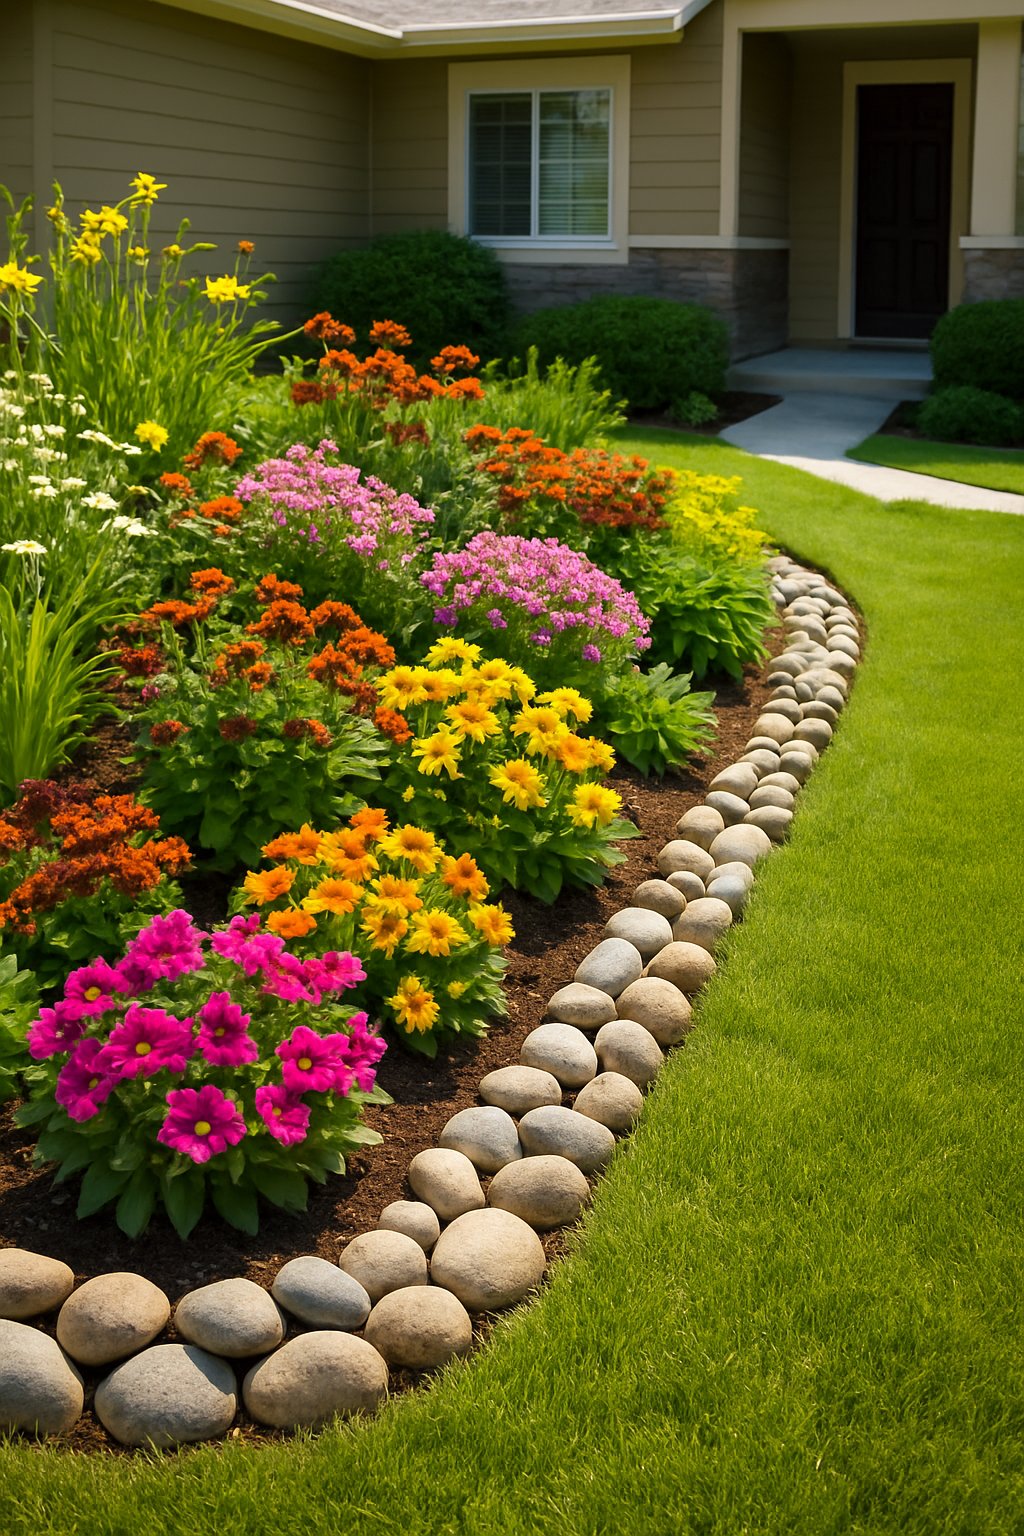
Defining your flower beds with a border creates a much more polished look. River rocks are an inexpensive and natural-looking option for a finished touch.
You can choose small, uniform stones for a clean, tidy appearance or mix different sizes for a more relaxed, organic feel. Either way, they do a great job of keeping mulch and soil contained.
Simply lay the rocks directly on the ground, or dig a shallow trench to help hold them in place. This creates a neat edge that makes mowing and trimming much simpler.
River rocks are extremely durable and blend seamlessly with your plants, making them a simple and low-maintenance choice.
Expert Tip: “Burying about one-third of each rock helps lock the border in place. This gives it a more permanent and integrated look.”
9. Paint your mailbox with bright, weatherproof paint to boost curb appeal instantly.

Your mailbox is a functional part of your yard, but it’s often overlooked. A quick coat of paint can transform it from an afterthought into a charming front-yard feature.
Select a color that stands out but still complements your home. A sunny yellow, crisp white, or bold red can all make a statement.
Be sure to use weatherproof paint to prevent peeling and fading. For the smoothest application, give the mailbox a good cleaning and light sanding first.
If you’re feeling creative, you can add simple stripes or polka dots. Even a small decorative detail can make it feel unique and special.
Expert Tip: Ensure your paint is suitable for the mailbox material, whether it’s metal or wood. Using a foam roller will help you achieve an extra-smooth finish.
10. Create a small herb garden near the front door for fresh scents and cooking perks.
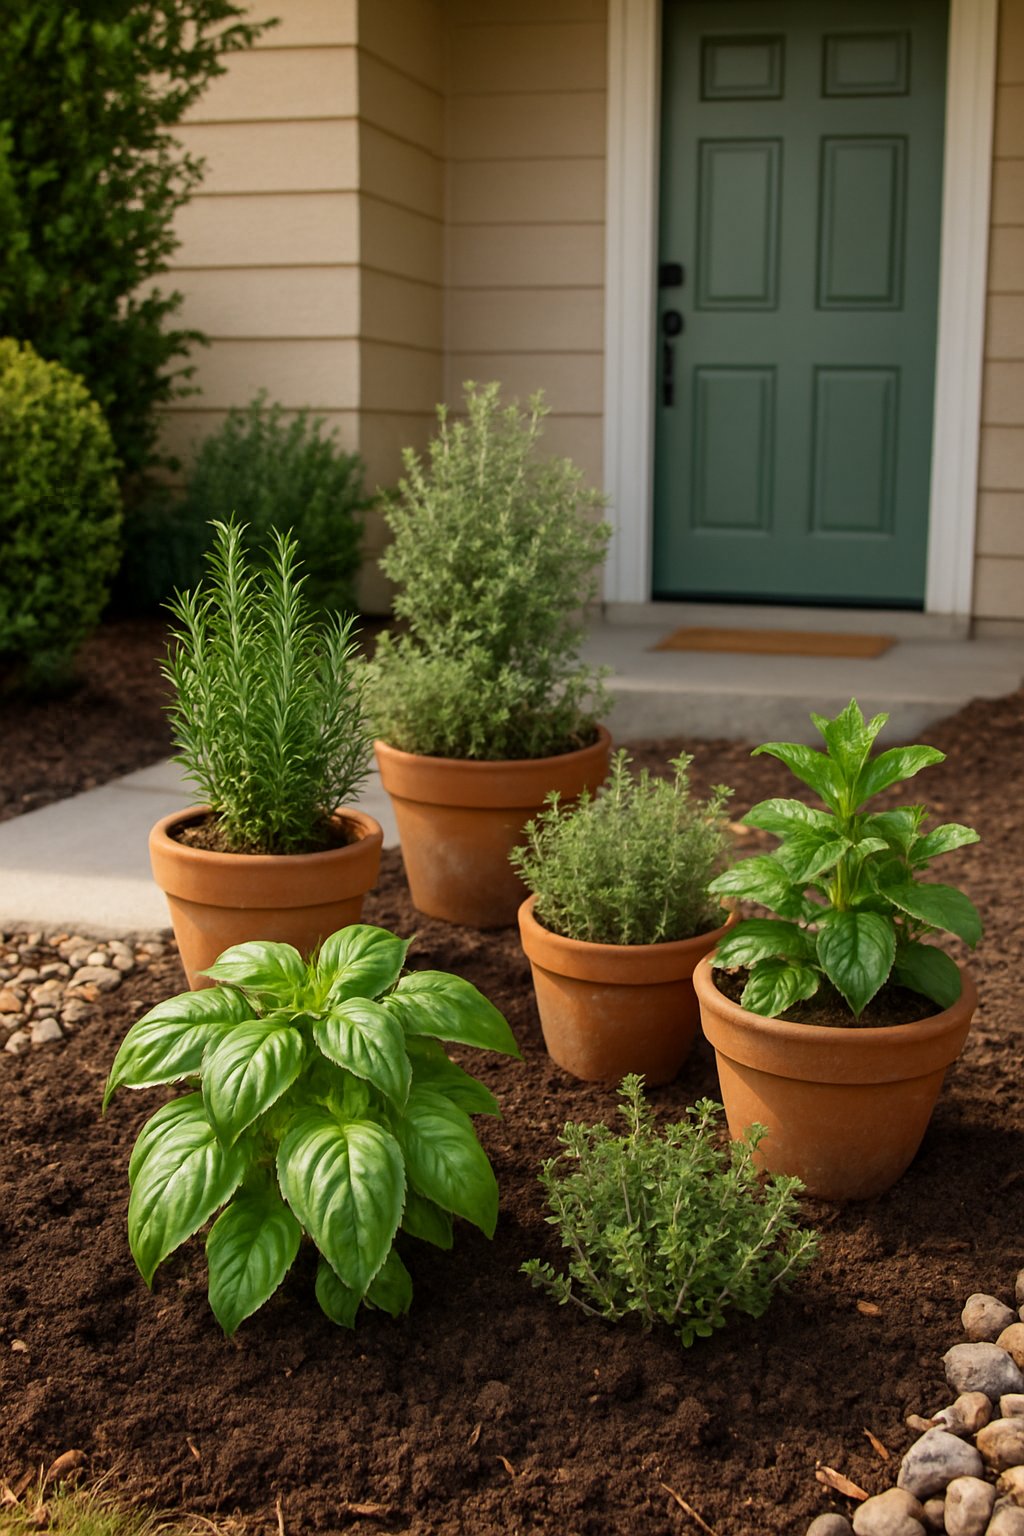
You don’t need a sprawling backyard to grow your own herbs. Planting a few varieties near your front door adds a wonderful fresh scent every time you pass by.
Keeping herbs close to the kitchen makes it easy to snip some fresh basil, mint, or rosemary while cooking. The lush greenery also looks beautiful and creates a welcoming entrance for guests.
All you need are a few pots, a sunny spot, and some well-draining soil. Mix different heights and textures to create a visually interesting and lively display.
Expert Tip: Begin with a few herbs that you frequently use in your cooking. Keeping them nearby will remind you to water them and use them often.
11. Hang vintage window frames as garden art on a fence or wall
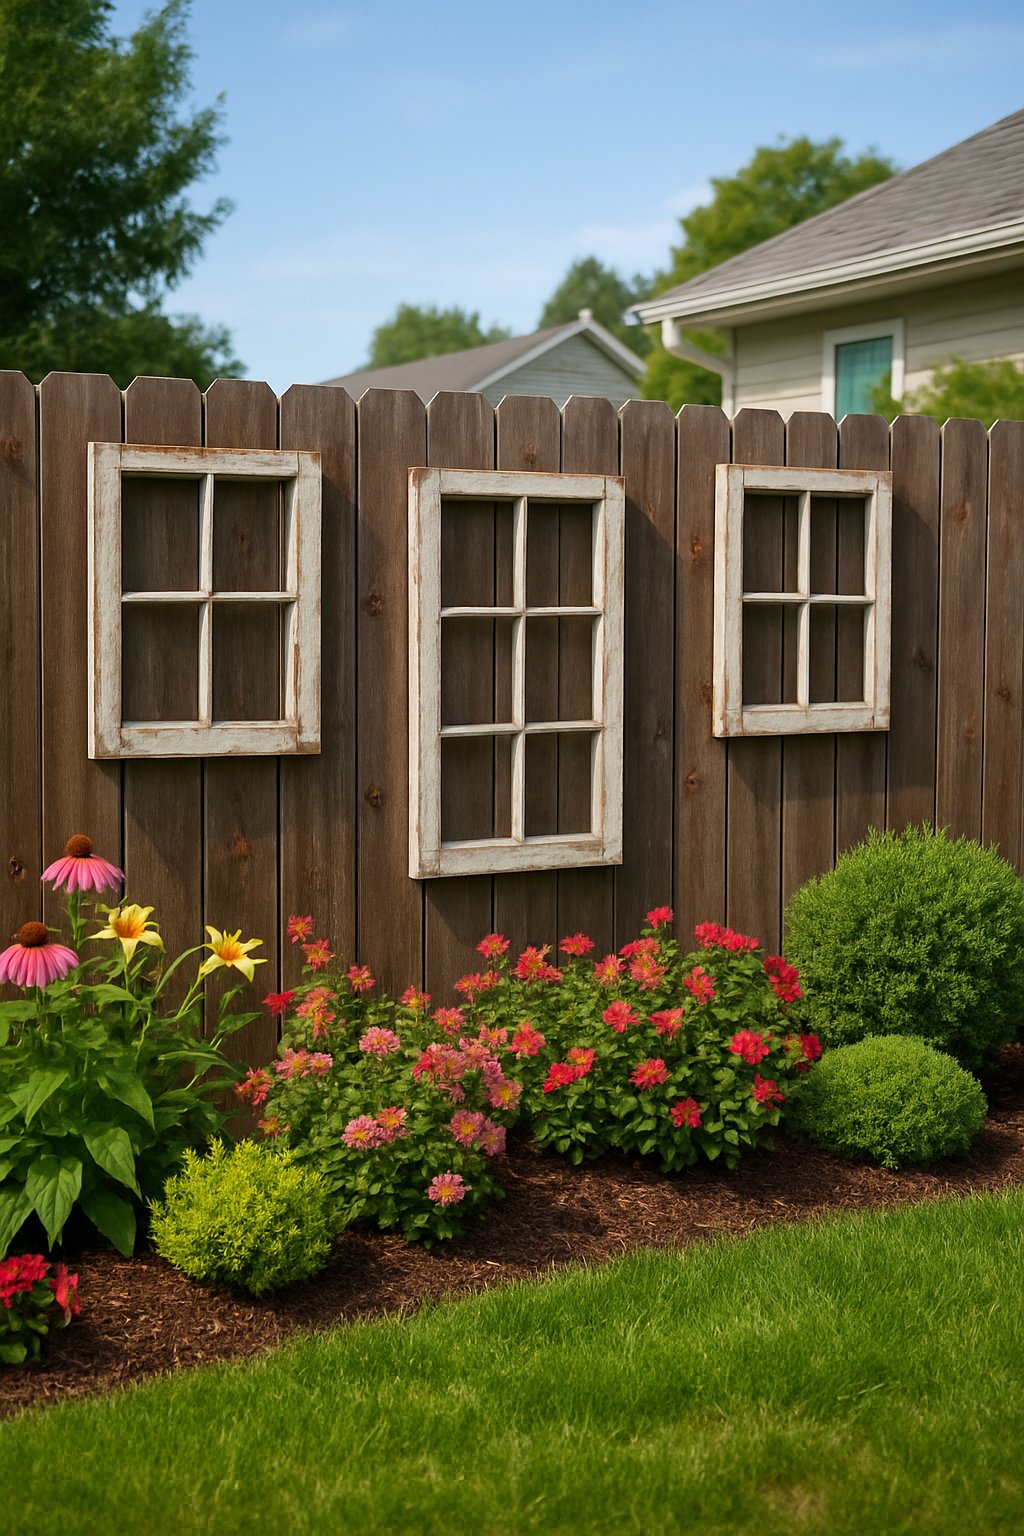
Don’t toss out that old window frame; it has the potential to become unique garden art. Hanging one on a fence or an exterior wall can add instant character to your space.
You can leave the wood weathered for a rustic, lived-in feel, or paint it a bright color to match your garden’s theme. The frame beautifully highlights the plants behind it, like a living piece of art.
Position it strategically where vines or flowers can weave through the openings. As the plants grow, they will integrate with the frame, creating a dynamic, ever-changing masterpiece.
Expert Tip: Hang the frame at eye level to maximize its visual impact. If you attach small planters, choose hardy plants that are low-maintenance.
12. Plant a row of lavender for color, fragrance, and pollinator-friendly charm.
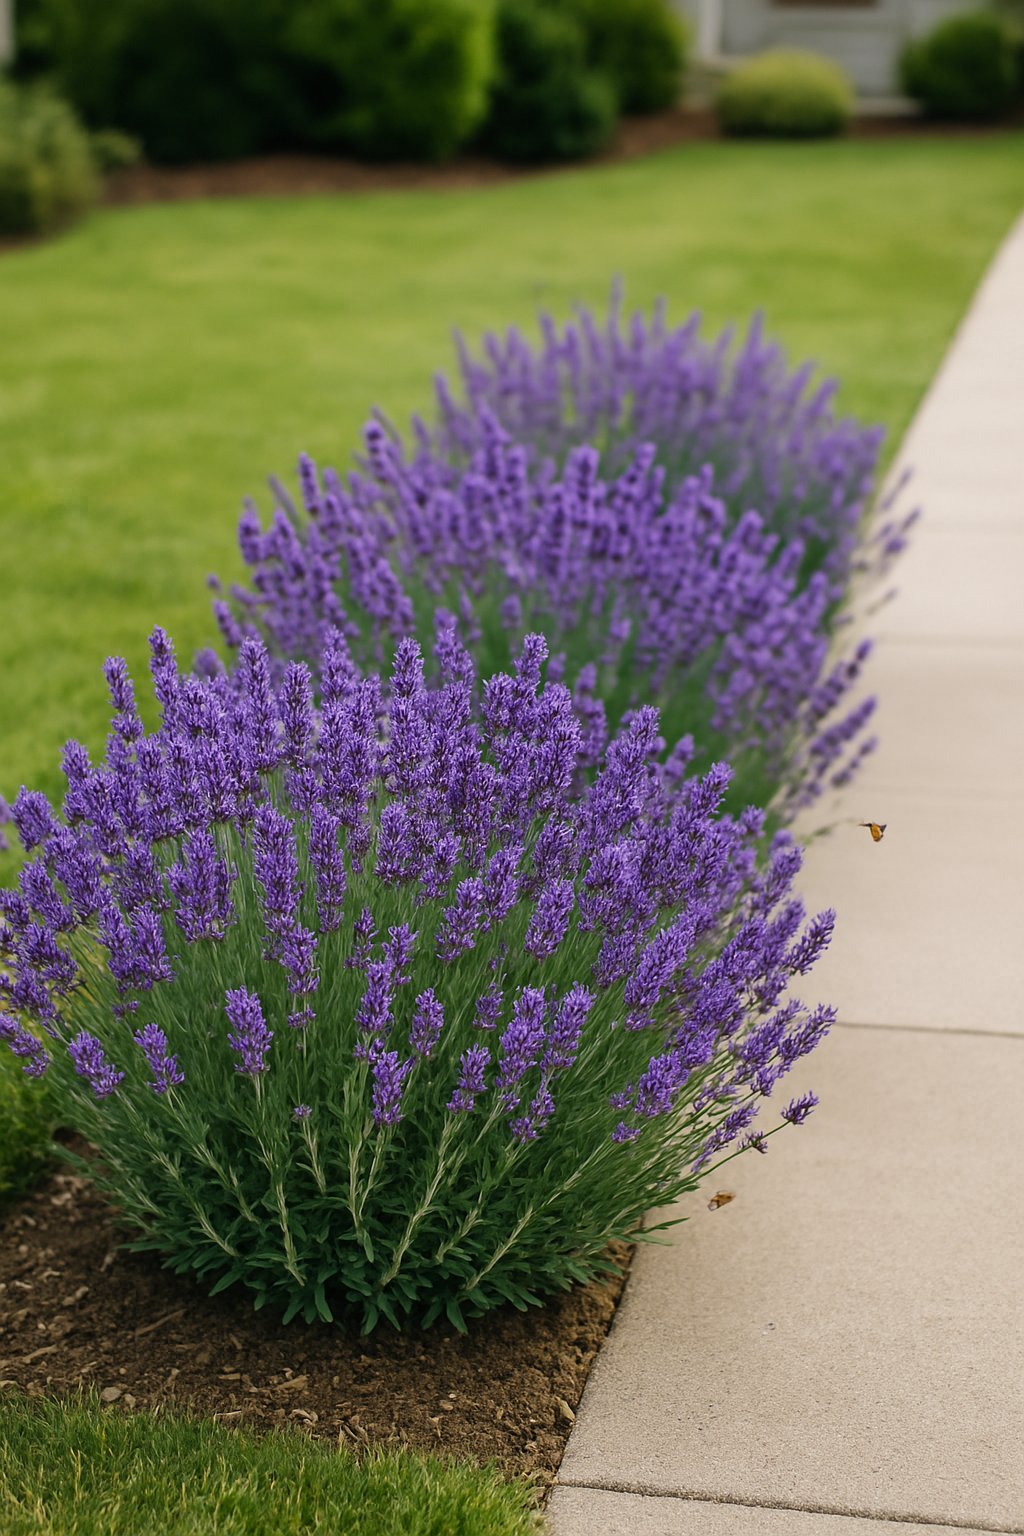
Lavender isn’t just for picturesque country gardens. It happens to be one of the simplest and most affordable plants you can add to your front yard.
A single row of lavender introduces a soft purple hue, a delightful fragrance, and a clean, organized look that complements nearly any home style. It stays beautiful for months and requires very little water once established.
The flowers attract bees and butterflies, bringing lively energy to your yard. Use lavender to line a walkway, driveway, or fence, and every trip outside will feel just a little more special.
Expert Tip: Allow about 12 to 18 inches of space between each lavender plant. A light trim after the flowers have faded will encourage bushy growth and more blooms next year.
13. DIY stepping stones with handprints or mosaic tiles for a personal touch
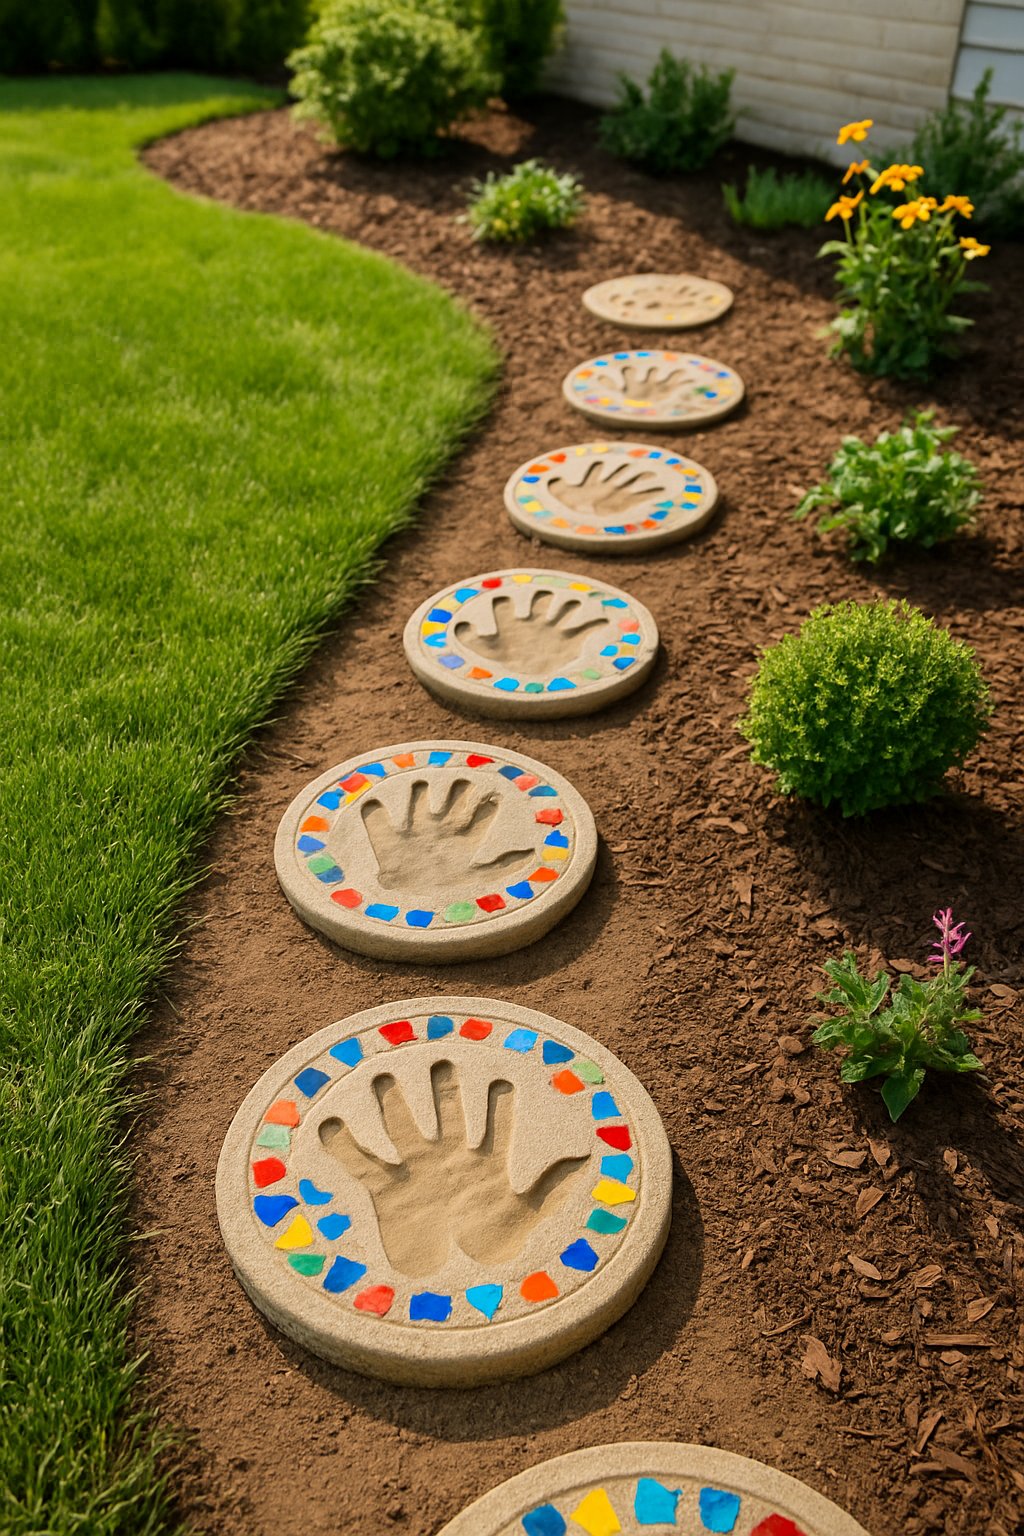
Plain gray stepping stones are functional, but why not turn them into small works of art? Your yard is the perfect place to show off a little personality.
Create a lasting memory by pressing handprints into wet cement. This is a fantastic project for kids, and you can add names or dates with a stick before the mixture hardens.
If you prefer more color, try a mosaic design. Use broken dishes, extra tiles, or colorful glass pieces to create a pattern before you pour the cement. The pieces will be locked into place as it sets.
This is a wonderfully cheap project, especially if you repurpose materials you already have. Plus, you can easily complete it over a weekend.
Expert Tip: “Finalize your design before the cement begins to set. It is much easier to make adjustments at this stage than to have regrets later!”
14. Use repurposed wine crates as stackable planters for succulents
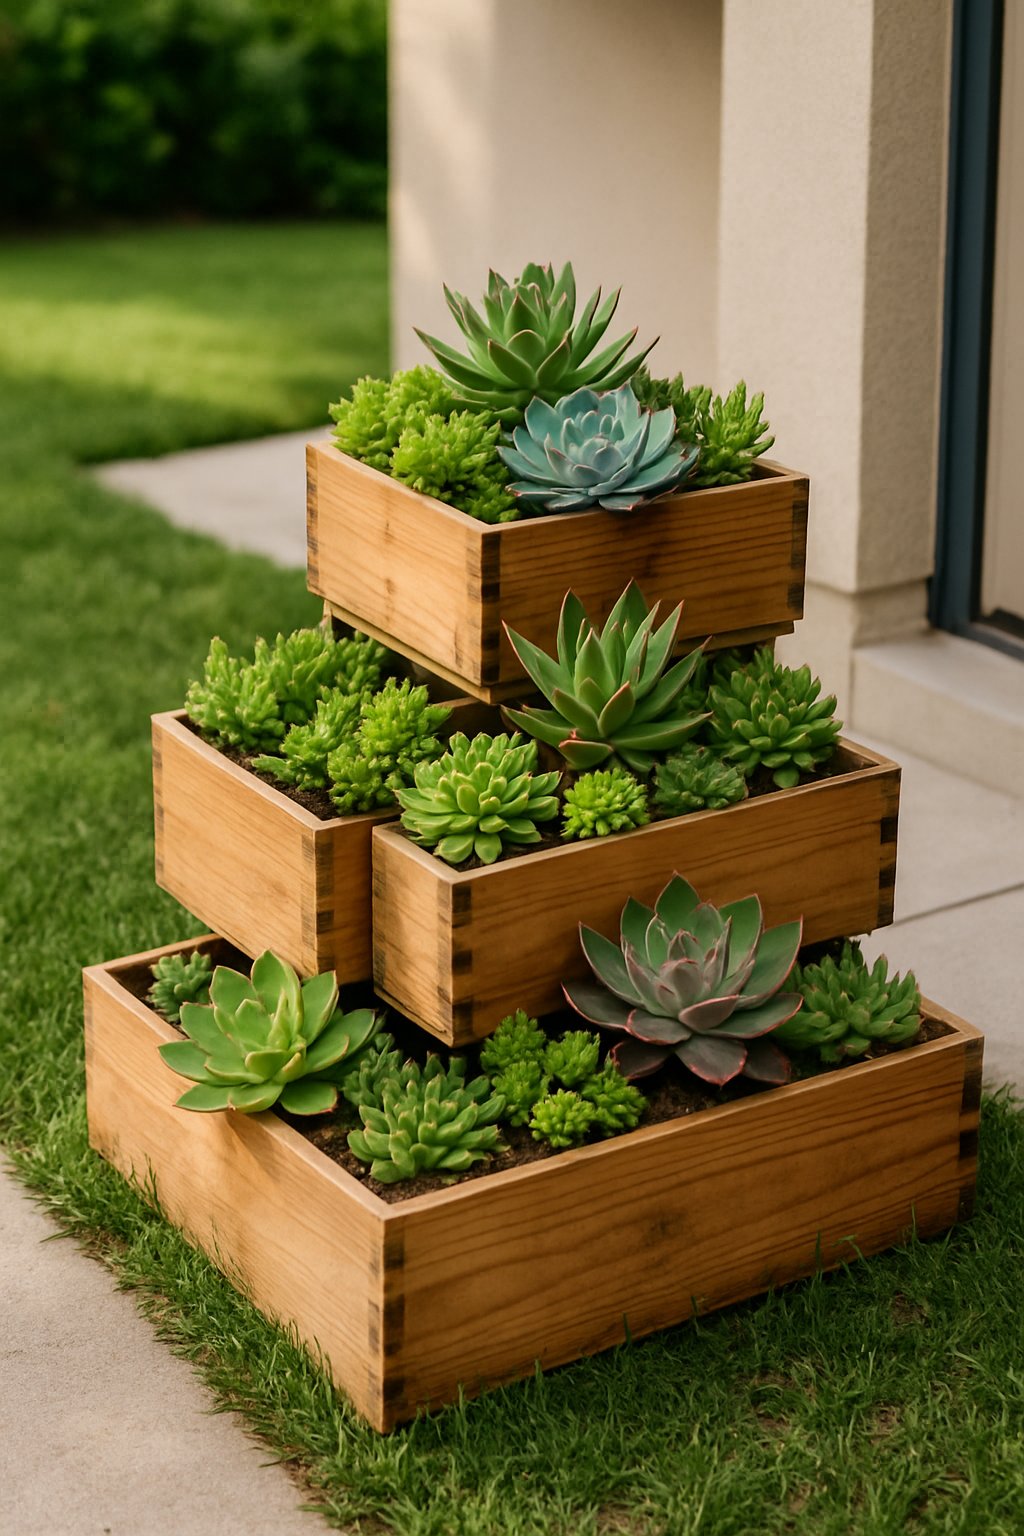
Planters can be surprisingly expensive. Wooden wine crates, however, are sturdy, attractive, and often available for free if you check with local stores.
Stack them to create a multi-level display that adds height and visual interest without taking up too much floor space. Succulents are a perfect match for these crates, as they thrive in shallow soil and don’t need much water.
Line each crate with landscape fabric to hold the soil. Fill them with a specialized cactus or succulent mix, and then arrange your plants to showcase their different colors and shapes.
Expert Tip: Remember to drill holes in the bottom for drainage. Even resilient succulents can’t tolerate waterlogged roots. A little space between the crates promotes airflow, which is great for the plants.
15. Add a charming bench made from reclaimed wood for a cozy seating spot
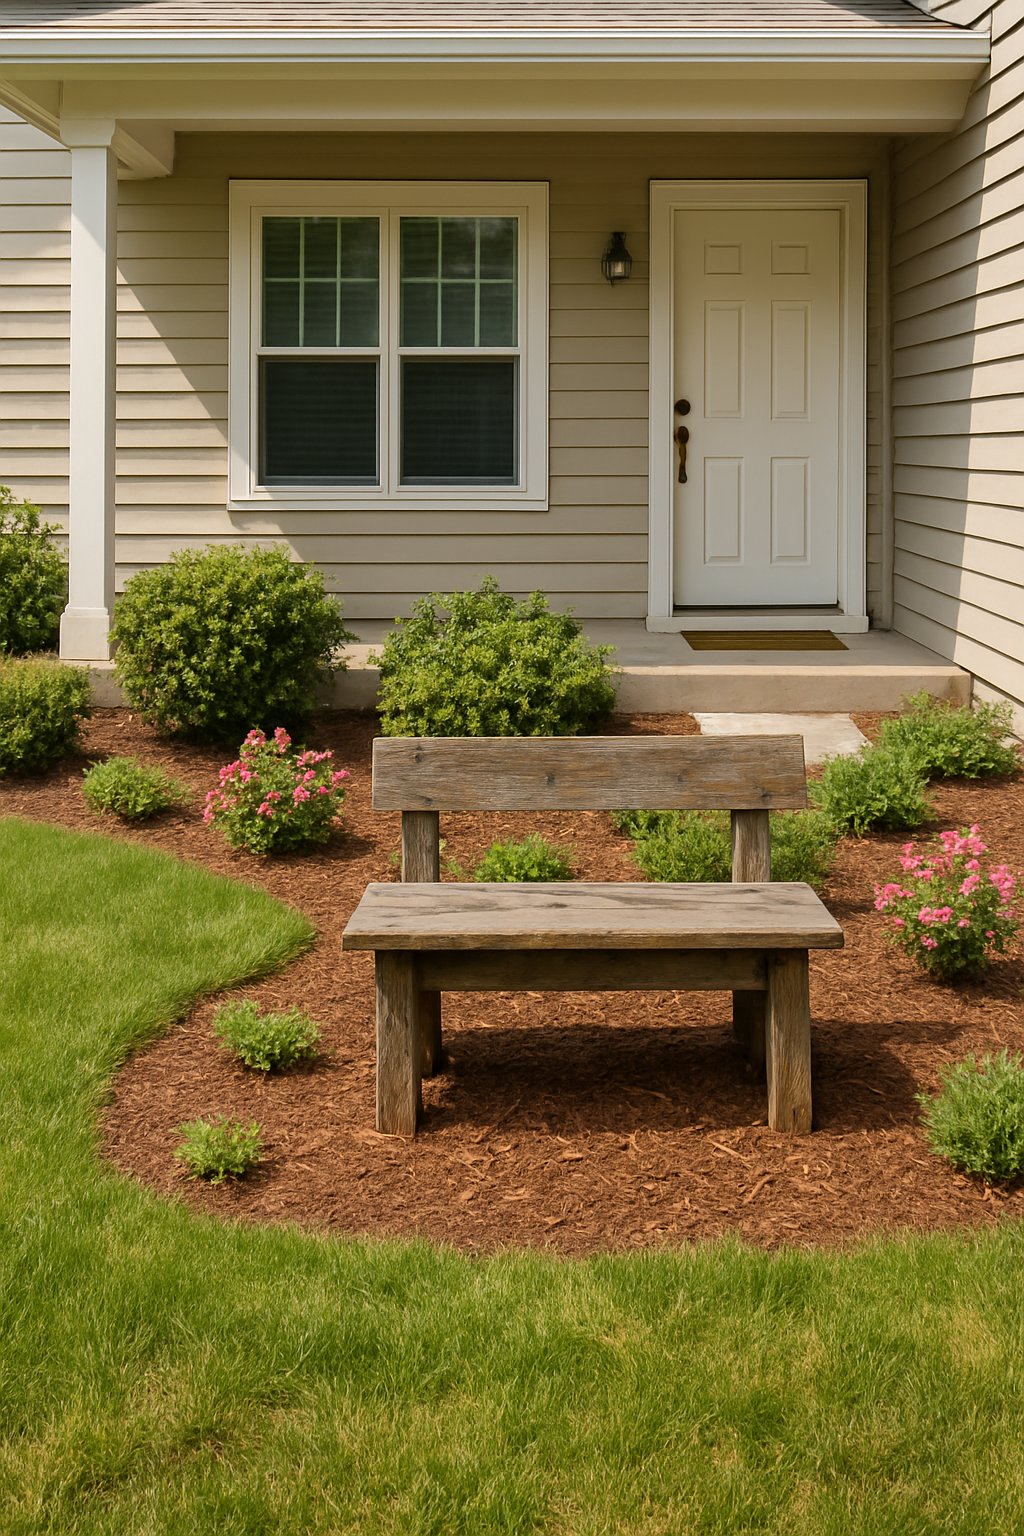
A new bench from a store is fine, but one made from reclaimed wood has a unique character all its own. The knots and imperfections tell a story and create a much cooler look.
You can source old wood from discarded furniture, pallets, or a local salvage yard. This approach is usually cheaper than buying new lumber and it’s an environmentally friendly choice.
A simple design is all you need. You don’t need specialized tools, just a solid frame and some smooth boards for the seat. Place your finished bench under a tree or along a path to create a perfect spot for relaxing.
Expert Tip: Choose wood that is still solid and free of rot. Sand it well and apply an outdoor sealant to protect it from the elements and ensure it lasts for many years.
16. Install a rain barrel to collect water for garden irrigation and save money
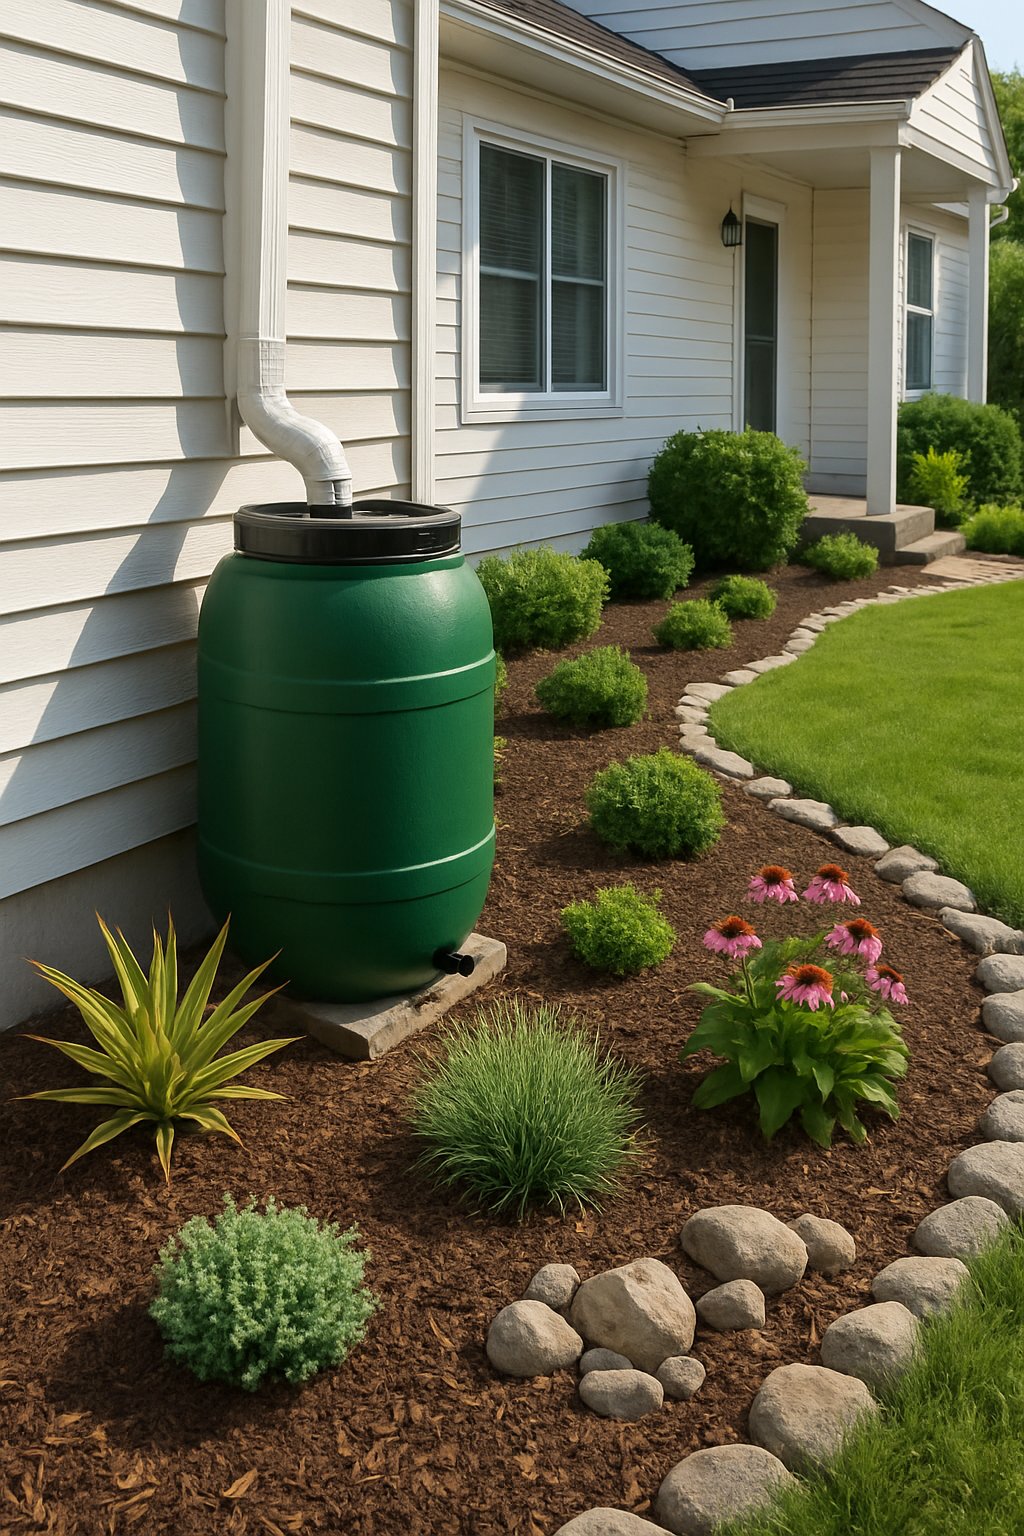
Have you ever noticed how much rainwater simply runs off your roof and down the drain? A rain barrel allows you to capture that free water, which can help you save money on your utility bills.
Just place the barrel under a downspout and let it collect water during the next storm. Most models include a spigot, making it easy to fill a watering can or attach a hose. It’s an ideal water source for your flowers, shrubs, and vegetables.
You can purchase a ready-made barrel or create your own from a food-grade container. It’s a quick project that requires only occasional cleaning.
Expert Tip: Make sure the lid is secure to prevent mosquitoes from breeding. It’s also important to empty the barrel before winter, as freezing water could cause it to crack.
17. Grow colorful marigolds to naturally repel pests and brighten the yard
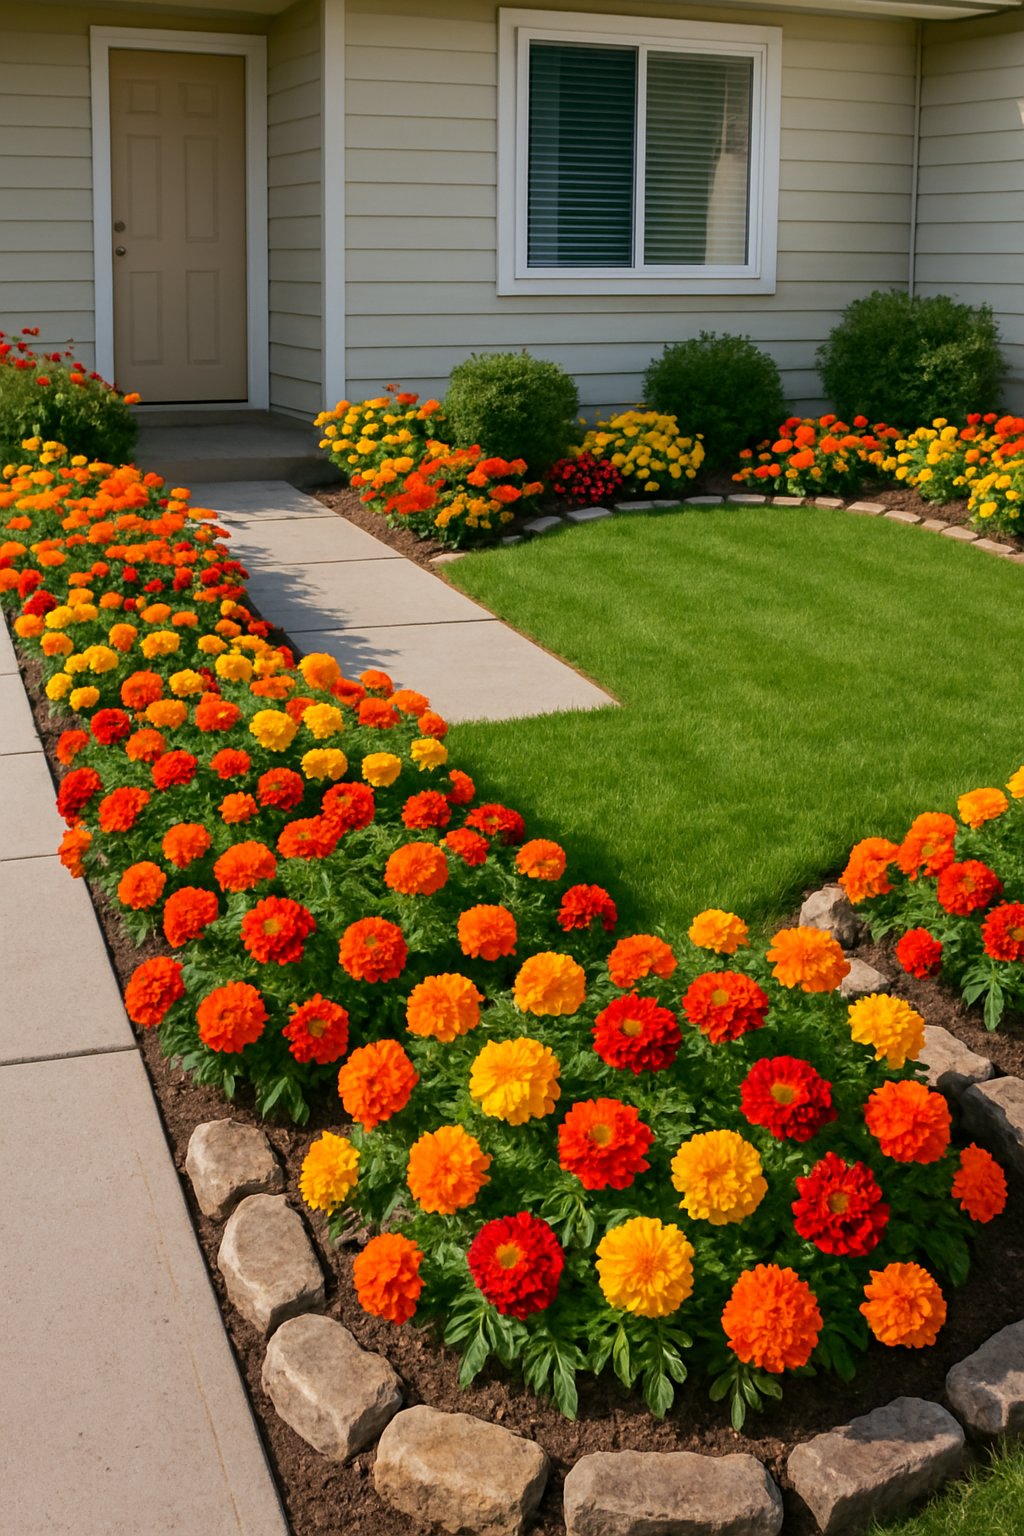
Marigolds are more than just a pretty flower. These cheerful yellow, orange, and red blooms are functional, too, helping to deter certain pests from your other plants.
You can plant them along borders, in containers, or interspersed with your vegetables. Their distinct scent and natural oils can help repel pests like aphids and nematodes, reducing the need for chemical sprays.
Marigolds are incredibly easy to grow from seed, making them a great choice for beginner gardeners. They thrive in full sun, require minimal water, and will bloom continuously from summer through fall.
Expert Tip: “Start your seeds indoors several weeks before the last frost. Planting a mix of different colors will create a front yard that really pops.”
18. Set up a simple trellis with climbing vines like clematis or morning glory.
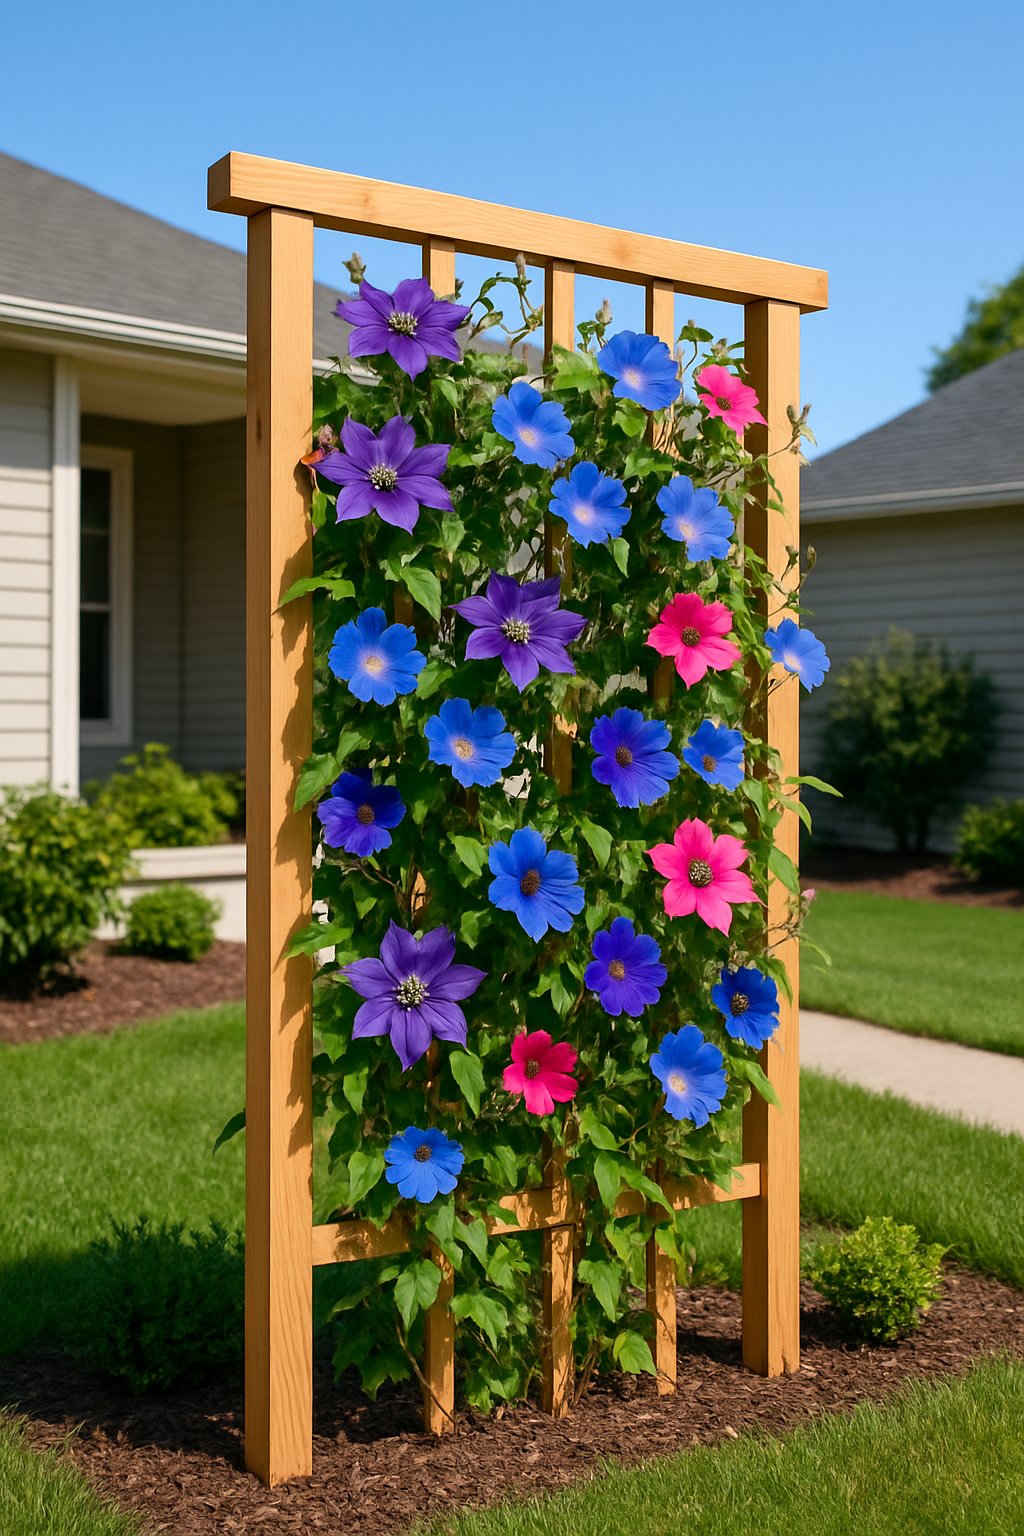
A trellis doesn’t need to be elaborate or costly. Even a simple, basic structure can add vertical interest, vibrant color, and a touch of charm to your yard for very little money.
You can build one from wood, bamboo, or metal rods, using whatever materials you have available. Place it near a wall, fence, or in an open area where the vines can get plenty of sunlight.
Fast-growing vines like clematis and morning glory produce an abundance of flowers. As they grow, they will naturally wrap around the trellis, transforming it into a living wall of color.
You can leave the frame with a natural finish for a rustic look or paint it to match your home for a more coordinated feel.
Expert Tip: Start with young plants to help them establish more quickly. Water them consistently for the first few weeks to encourage strong root development.
19. Use mulch made from shredded leaves or bark to keep weeds at bay cheaply.
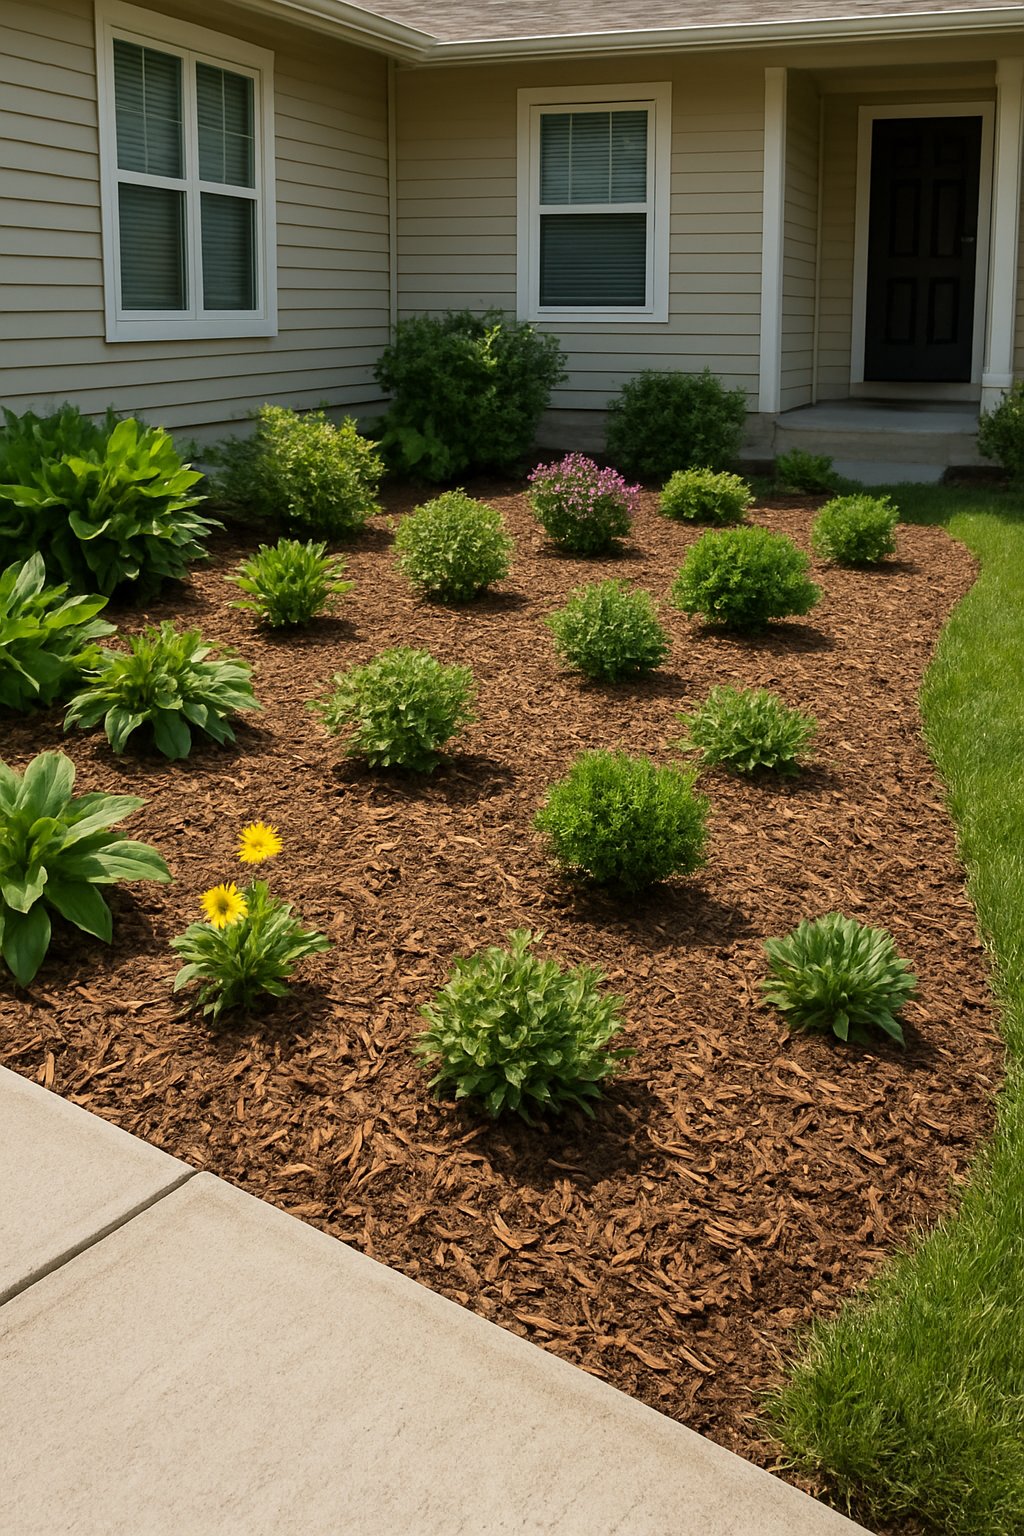
Weeds are a relentless problem, but you can effectively suppress them without spending a lot. Shredded leaves or bark create a natural mulch that blocks sunlight from reaching weed seeds.
Simply collect fallen leaves, run your lawnmower over them to shred them, and spread the material around your plants. Bark mulch is also effective, and you can save money by purchasing it in bulk.
Both types of mulch help the soil retain moisture and stay cool during hot summer months. As they decompose, they also enrich the soil, making your plants healthier.
Expert Tip: Shredding leaves before applying them as mulch prevents them from matting together and blocking water. A thin, even layer is more effective than a thick, heavy pile.
20. Create a fairy garden in a corner with small plants and whimsical decorations
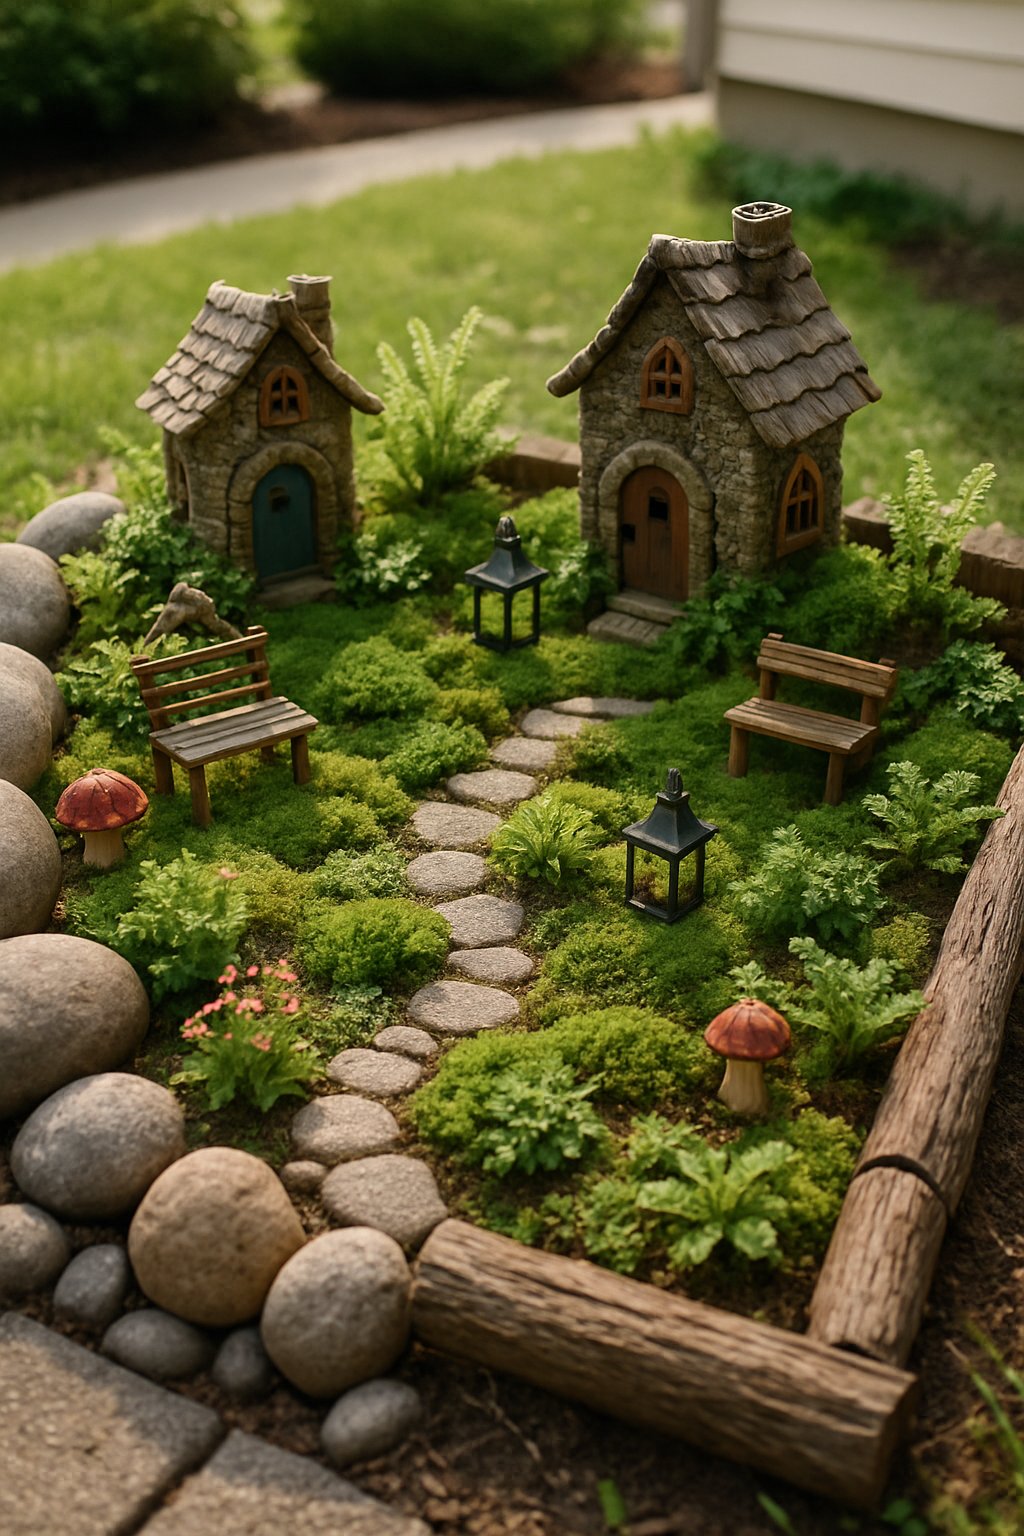
If you have a bare corner in your yard that looks a bit neglected, it could be the perfect location for a miniature fairy garden. This project requires minimal space and money, just a few small plants and some imaginative decorations.
Choose hardy, low-maintenance plants like moss, succulents, or tiny ferns. They are naturally small, look adorable, and are very easy to care for.
Incorporate whimsical touches like miniature fairy houses, paths made of pebbles, or a tiny bench. You can repurpose old teacups, jars, or broken pots as creative props for your fairy garden.
Expert Tip: Start with a small setup and gradually add more elements over time. This approach is more budget-friendly and allows you to watch your fairy garden magically evolve.
21. Paint rocks with fun designs to scatter around flower beds for a pop of color.
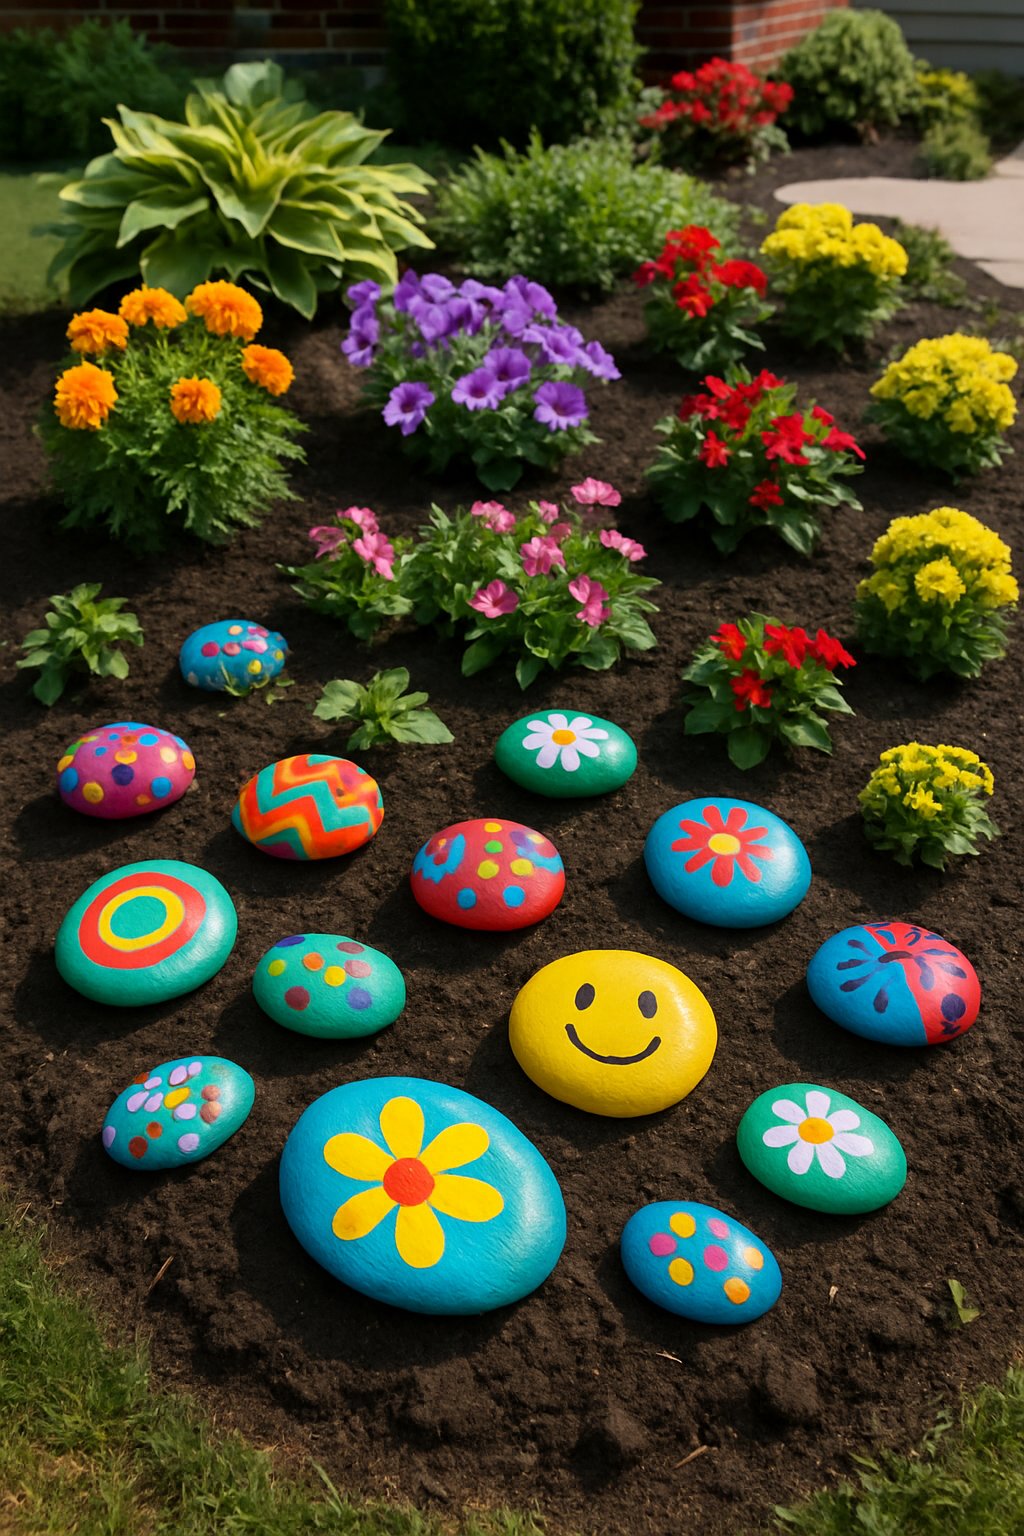
Garden decorations don’t have to be expensive. With just some smooth rocks and a few bottles of paint, you can unleash your creativity and add a personal touch to your yard.
Paint colorful flowers, abstract patterns, or cute little ladybugs on the rocks. You can then place these vibrant creations among your plants or use them to line a pathway for an instant burst of cheer.
This is a fun and easy project for all ages, so it’s a great way to spend a lazy weekend with family or friends. To protect your designs from the elements, seal the painted rocks with a clear coat.
Expert Tip: Flat, smooth rocks are the easiest to paint on. Apply a coat of outdoor varnish to ensure your colors remain bright and vibrant throughout the year.
22. Plant bulbs like tulips or daffodils for spring blooms without ongoing costs.
Flowers can seem like a recurring expense, but planting bulbs is a smart alternative. You put them in the ground just once, and they will return to bloom every spring without any additional cost.
Tulips, daffodils, and hyacinths are excellent choices for beginners. Plant them in the fall to allow them to establish roots before winter sets in. Come spring, you’ll be rewarded with a vibrant display of color with no extra effort.
You can tuck bulbs along walkways, under trees, or in your garden beds. They don’t require much space and will remain dormant underground until it’s their time to shine.
Expert Tip: Plant your bulbs in groups with odd numbers for a more natural and visually appealing look. Mix varieties that bloom at different times to extend your season of color.
23. Use old boots or teapots as quirky planters for small flowers

That old boot or chipped teapot isn’t junk. It’s a unique planter just waiting to be given a new purpose.
Old boots are surprisingly effective at holding soil and are perfect for small flowers or succulents. Just remember to create a few drainage holes in the sole to prevent water from accumulating.
Teapots are ideal for compact plants like pansies or herbs. Their handles make them easy to reposition, and their unique shapes add instant charm. A brightly colored teapot can become an immediate focal point.
You can place these unconventional planters on your front steps, hang them from a fence, or group them together for a playful and creative display. It’s a budget-friendly and clever way to reuse items you already own.
Expert Tip: Select plants that won’t quickly outgrow their new home. Small blooms or trailing vines will keep your quirky planters looking cute and well-proportioned.
24. Build a DIY compost bin to recycle kitchen scraps and enrich your soil.
Those banana peels and coffee grounds in your trash are actually a hidden treasure for your garden. Transforming kitchen waste into nutrient-rich compost is much simpler than you might think.
Plus, making your own compost means you’ll spend less on soil and fertilizers. It is a win-win situation.
You can build a compost bin from materials you have on hand, like a plastic tub, old wooden pallets, or even a large trash can. Just make sure to add some holes for air circulation.
Fill the bin with a mix of fruit and vegetable scraps, grass clippings, and dry leaves. Keep the pile slightly damp, like a wrung-out sponge, and turn it with a shovel every week or so.
In a few months, your pile will transform into dark, crumbly compost that your plants will absolutely love. You’ll feel like a true garden wizard.
Expert Tip: Begin with a small bin to keep the process manageable. Even a small amount of homemade compost can significantly improve the health of your garden.
25. Add a chalkboard sign with a welcome message or garden notes for personality.
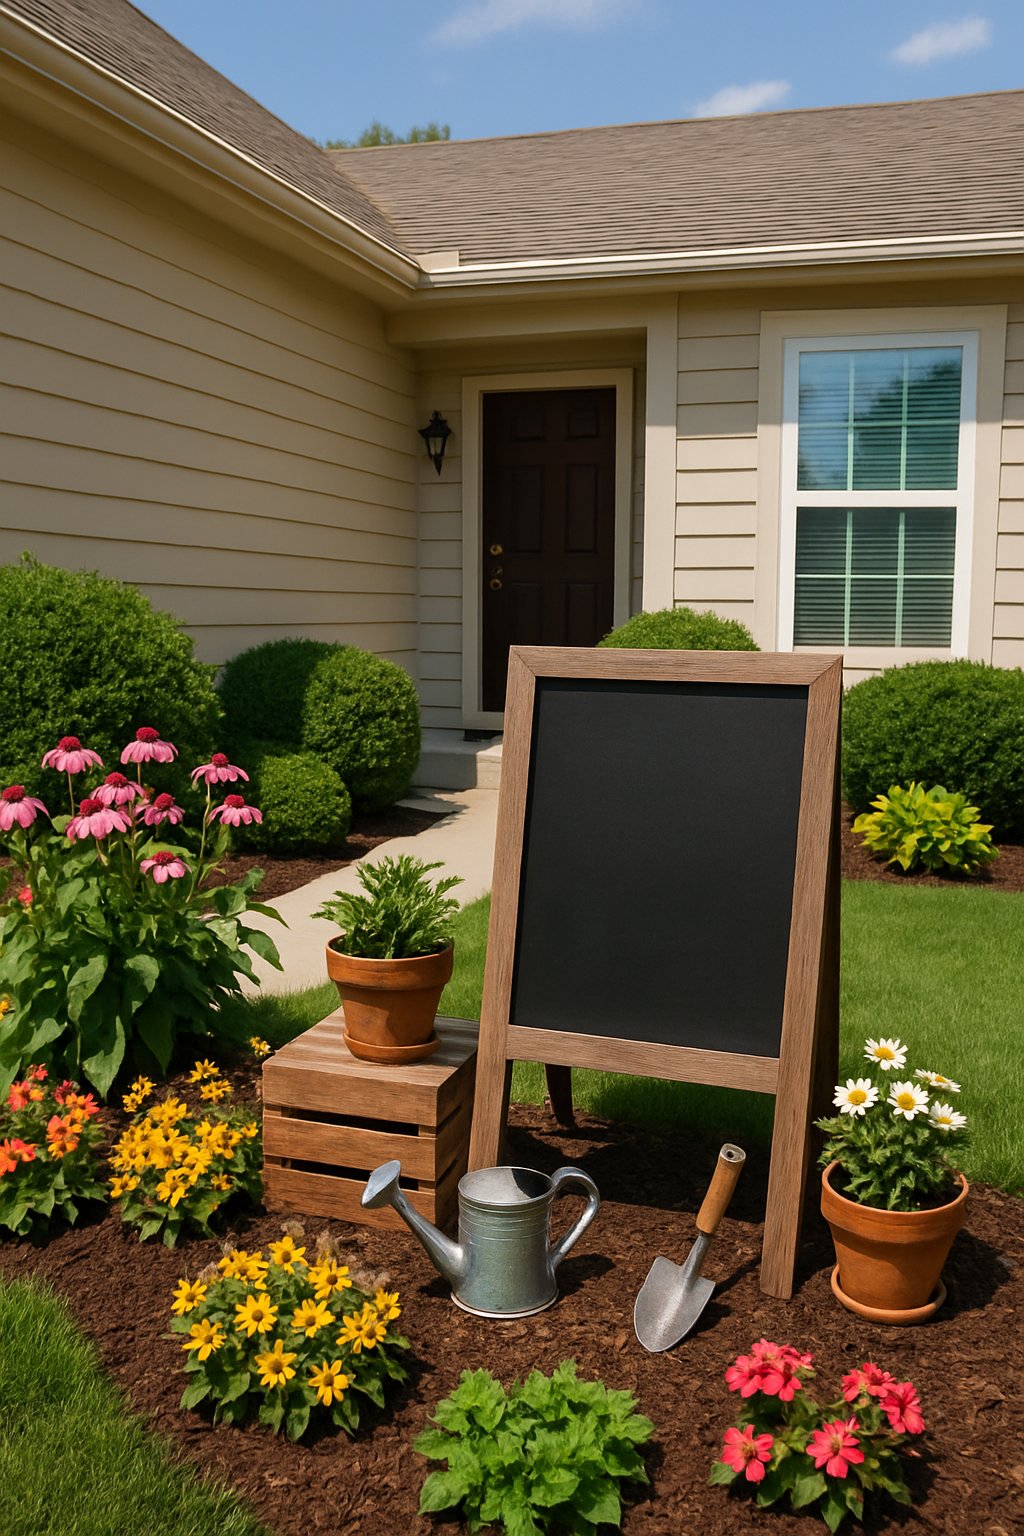
A simple chalkboard sign is a great way to greet visitors with a friendly message before they even reach your door, and it’s an incredibly affordable project.
You can write a cheerful “Welcome,” a funny garden pun, or a note about what’s currently in bloom. If you have a vegetable garden, you could even list what’s ready to be harvested.
The best part about a chalkboard sign is that it’s easy to update. You can change the message for holidays, special occasions, or just whenever you feel inspired.
You can buy a pre-made board, apply chalkboard paint to a piece of scrap wood, or even repurpose an old cabinet door. The key is to have fun with it.
Expert Tip: Keep chalk nearby so you can easily update your message. A fresh greeting or note keeps your front yard feeling dynamic and new.
26. Use inexpensive solar stake lights to outline your driveway or paths.

Navigating a dark driveway at night can be a clumsy experience. Solar stake lights offer a simple and affordable solution to this problem.
There are no wires to run or complicated tools required. Just push the stakes into the ground along your path or driveway, and let the sun do the work.
Most solar lights turn on automatically at dusk, so you never have to worry about flipping a switch. They also add a polished, finished look to your yard.
You can choose from a variety of styles, from sleek stainless steel to soft, warm white, to match your personal aesthetic. Even just a few lights can make a significant difference. You’ll probably wish you had done it sooner.
Expert Tip: For the best performance, place each light in a location that receives plenty of direct sun. If your path is in a shady area, you can position the solar panel in the sun and connect it to the lights with a cord.
27. Plant a mix of perennials and annuals for continuous color without replanting all year
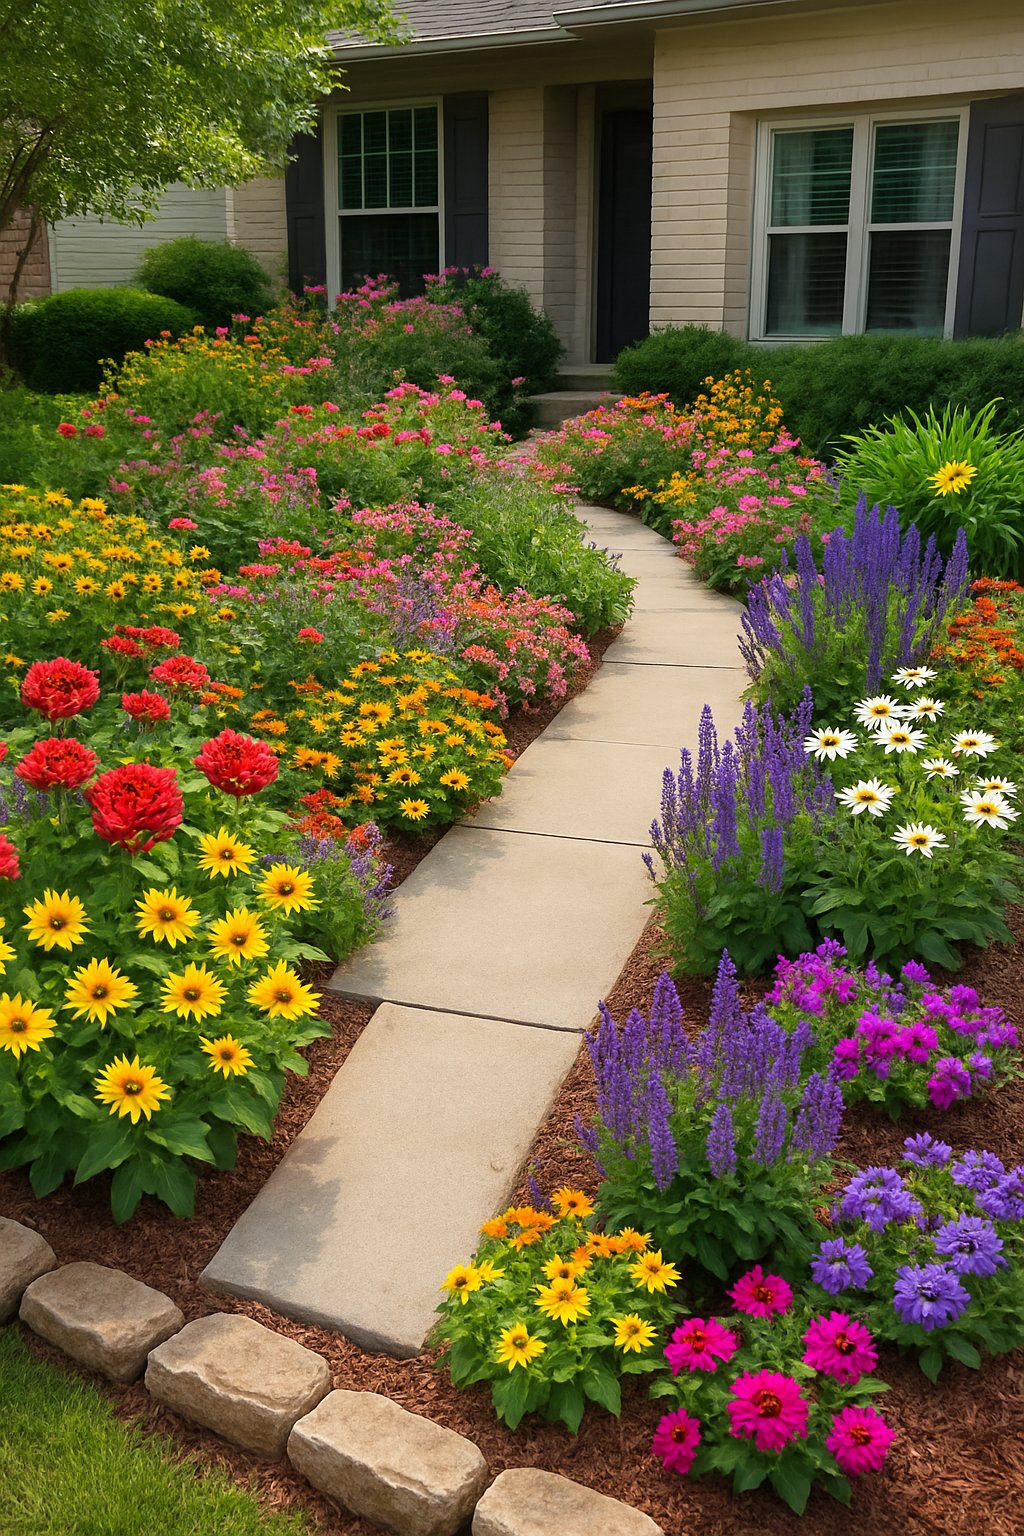
It can feel like flowers have a very short lifespan, but it doesn’t have to be that way. By planting a combination of perennials and annuals, you can create a continuous display of color from spring through fall without having to replant your entire garden every few months.
Perennials are the dependable foundation of a garden. You plant them once, and they reliably return each year with minimal fuss.
They save you time, money, and a lot of effort. They provide a consistent base of foliage and blooms that appear right on schedule.
Annuals, in contrast, are the vibrant, temporary stars. They fill in the gaps when your perennials are not in bloom, adding fresh bursts of color exactly where you need them.
Try tucking them in between larger plants or using them to fill any empty spots. This ensures your yard never looks sparse or dull.
Select a mix of plants with different heights, colors, and bloom times. It may seem simple, but this strategy makes a world of difference.
With this approach, something will always be blooming, and your front yard will feel vibrant and alive for months on end.