A cinder block fire pit is the perfect answer for a quick, simple, and budget-friendly weekend project. The images below show just how easy it is to assemble one. You might even have these concrete blocks lying around your yard, or you could score some for free on Craigslist. Explore these ideas and plans for building a fantastic fire pit without breaking the bank. The most basic plan uses only blocks, but if you have a little extra to spend, you can enhance the look with other outdoor stones or pavers, though the simple design is powerful on its own.
Before you start building, it’s important to understand both the pros and the cons of using cinder blocks for your pit.
Pros:
Cinder blocks are inexpensive and large, meaning you only need a handful to create a substantial fire pit at a minimal cost. Their heavy weight means you don’t necessarily have to secure them together, which makes assembly a breeze. Plus, they are available everywhere, and some people are happy to give them away just to clear out their space.
Cons:
These blocks are Fire Resistant, not Fire Rated, and there’s a significant difference between the two. Extended exposure to fire can cause them to break down over time. Aesthetically, they aren’t as refined as other landscaping stones. It’s also challenging to create a perfectly round fire pit with rectangular blocks, though it’s certainly not impossible, as some of the ideas below prove.
Your Costs
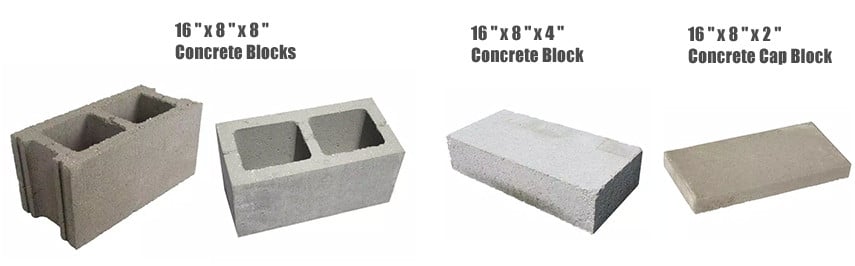
Let’s break down the costs if you decide to buy new blocks. At Home Depot, a 16″ L x 8″ H x 6″ W cinder block with holes starts at $1.15, while at Lowe’s, a similar block is $1.13.
The largest and most common block for fire pit projects, measuring 16″ x 8″ x 8″ with holes, costs just $1.37 per piece. A 16″ x 8″ x 4″ cap block is only $1.55.
Using these prices, a great DIY pit plan would cost you $27.40 for 20 blocks plus $15.50 for 10 caps, totaling $42.90 plus tax. You get the picture. It’s an incredibly affordable project.
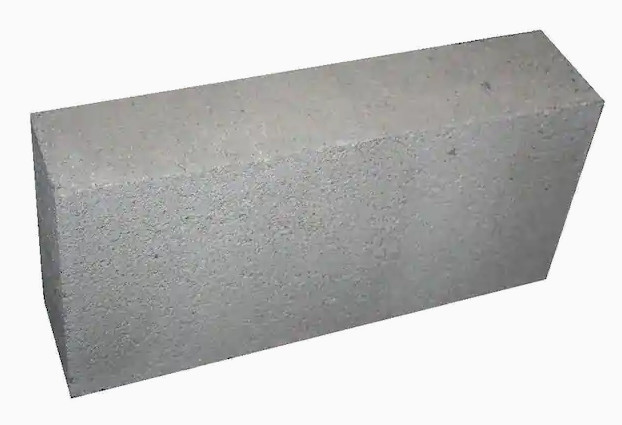
Which Blocks?
You have a few shapes and sizes to choose from, as shown in the image above. Blocks with holes are hollow all the way through, while others are solid. The thin, solid blocks (16″ x 8″ x 2″) are known as caps.
The 8-in x 8-in x 16-in Standard Cored Concrete Block from Lowe’s is a very popular option, priced at $1.35, which is just slightly cheaper than at Home Depot.
Fire Resistant vs. Fire Rated
Cinder blocks are fire resistant, which means they will not burn. However, they are not fire rated. This means prolonged and repeated exposure to high heat can cause them to crumble and deteriorate.
You can find more detailed information about the fire ratings of concrete masonry at the National Masonry Association website.
TIP: A key takeaway from that resource is that filling the holes in cinder blocks with gravel or crushed rock actually improves their fire rating. This is a fantastic and simple tip to make your pit more durable.
If you check reviews, you’ll find a general caution against using these blocks in fire pits because they lack a fire rating. Some DIYers suggest placing a steel fire bowl or a metal fire pit ring inside to shield the blocks and maintain the structural integrity. Others recommend lining the pit with firebricks, though this will significantly increase the cost of your project.
Ultimately, you are creating a very inexpensive fire pit, often with free or recycled materials. It’s best to keep expectations realistic.
Will they Crack or Explode?
These are common questions. Is it safe to use cinder blocks for a fire pit? How do they hold up to intense heat? Economically, it is the cheapest route, but safety is key.
Research shows very few instances of blocks “exploding.” In one account, a loud pop was heard with almost no debris. In another, there was minor debris. However, many people have reported that their blocks cracked over time.
Here are some of the most helpful insights:
You can use these blocks, but if the fire is too large, the heat can dehydrate the concrete, leading it to crack and fall apart. Another user noted, “The cinder block does crack. No violent explosions here, just a muffled popping sound then cracks appeared on any blocks exposed to direct heat.” Another expert stated, “It would take very intense heat for a concrete block to ‘explode.’ (Think cutting torch temperatures). Over time, they will deteriorate with heat.” There is also a Reddit discussion with more firsthand experiences.
Verdict: Exercise some caution. Try to avoid leaning burning logs directly against the blocks. A good strategy is to build a larger pit but maintain a smaller fire in the center.
How to Secure Cinder Blocks Together
TIP: Don’t do it. If a block cracks, it will be much easier to replace if it isn’t glued down.
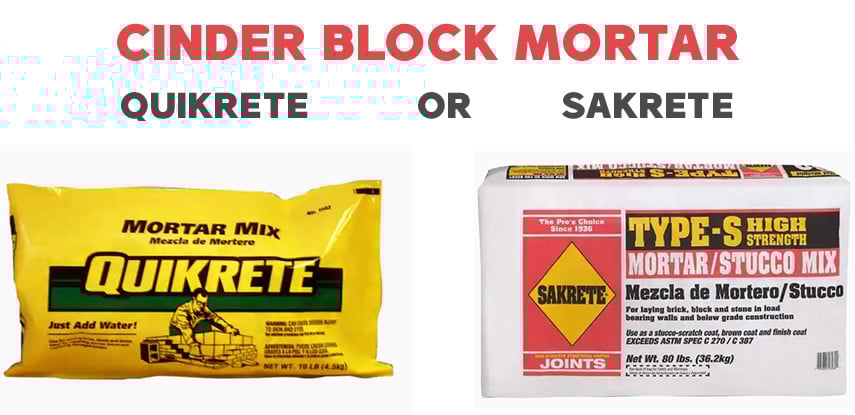
However, if you choose to secure them, you’ll need to spend a few extra dollars on either a mortar mix, which is more fire resistant, or a masonry adhesive.
For mortar, the two options shown below are excellent choices.
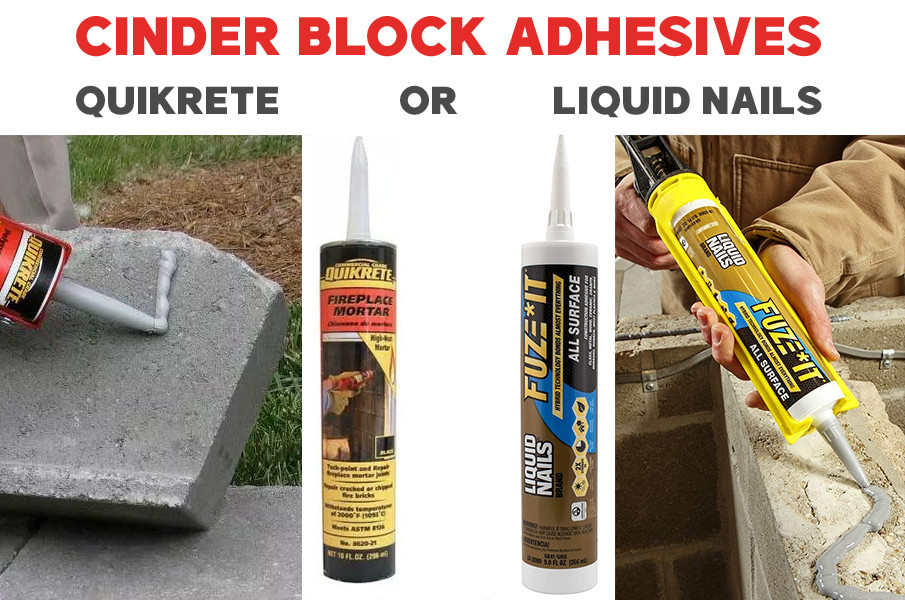
Is gluing the blocks necessary? Not really. They are heavy enough to stay put, as long as no one is deliberately trying to push them over. If you have small children, however, gluing them together is a safer option.
Two adhesives well suited for this project are Quikrete Construction Adhesive and Quikrete Fireplace Repair Mortar. When in the store, it’s a good idea to ask which product holds up better near high heat.
3 DIY Plans
If cinder blocks aren’t for you, check out these other DIY fire pit ideas.
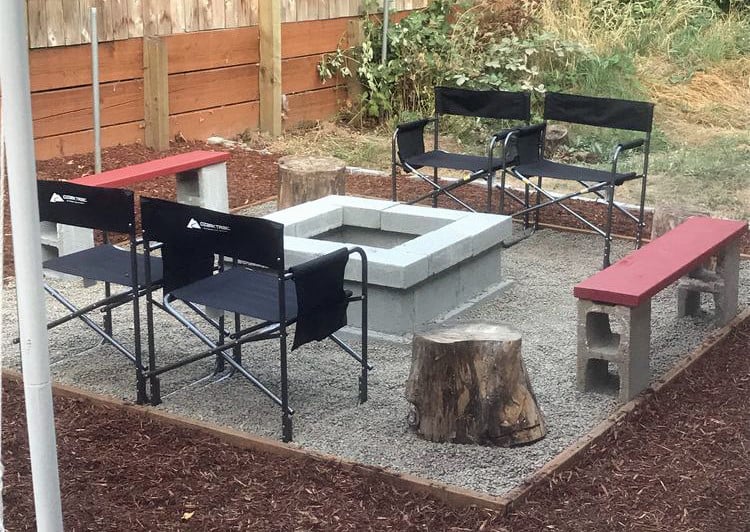
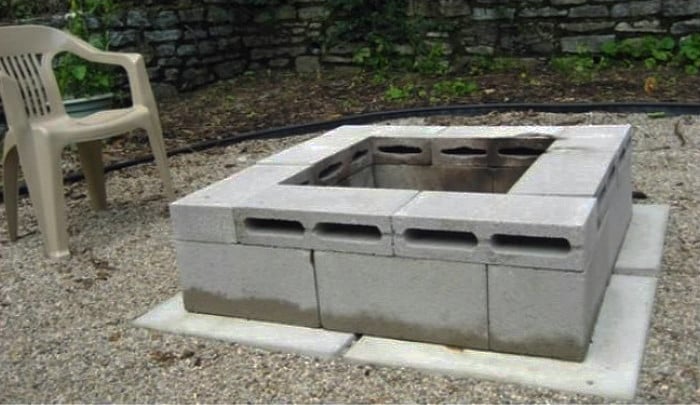
1. Under $60 Plan that You Can Simplify Even Further
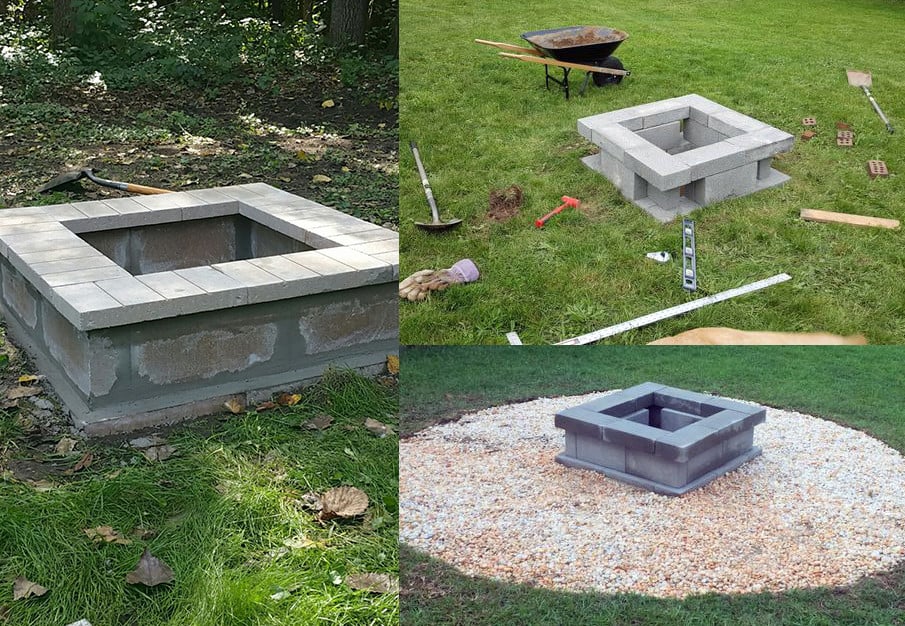
This is a quick and straightforward fire pit plan constructed from cinder blocks and topped with concrete caps. Several DIY projects have used this tutorial as a base, creating similar designs. Some builders used different materials or colors for the ground layer, while others simplified the idea even more by building directly on the ground. You’ll see variations with and without pavers on top. You can build it by following the tutorial.
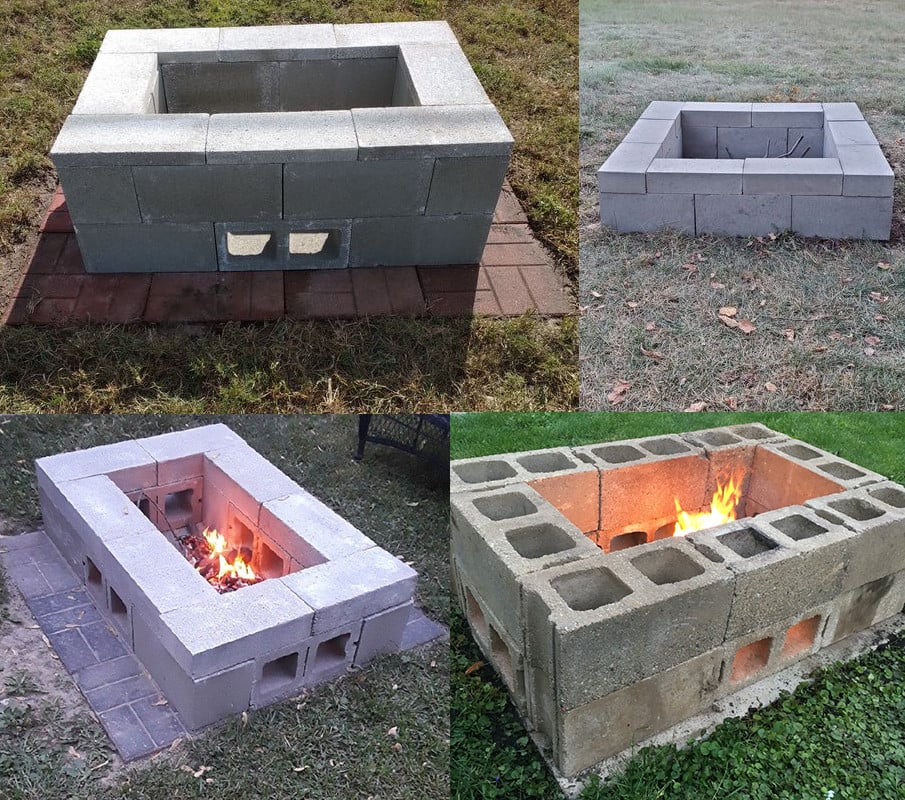
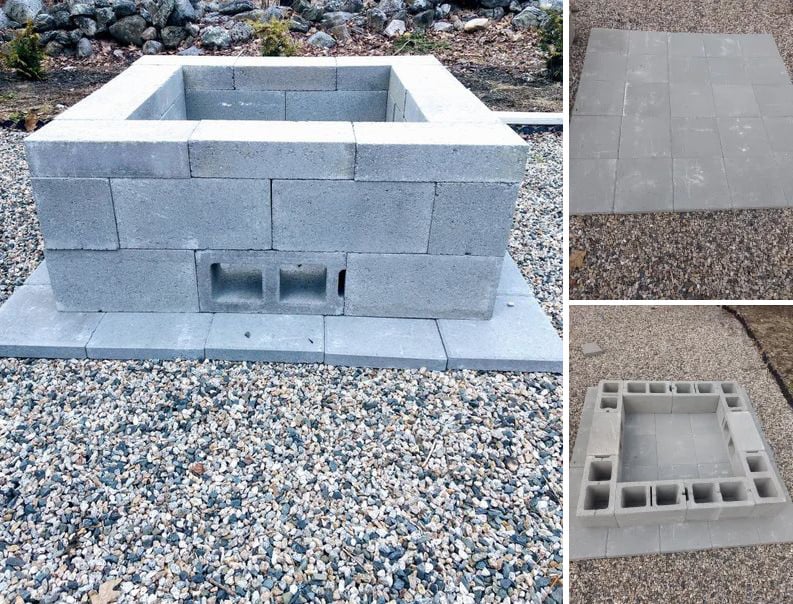
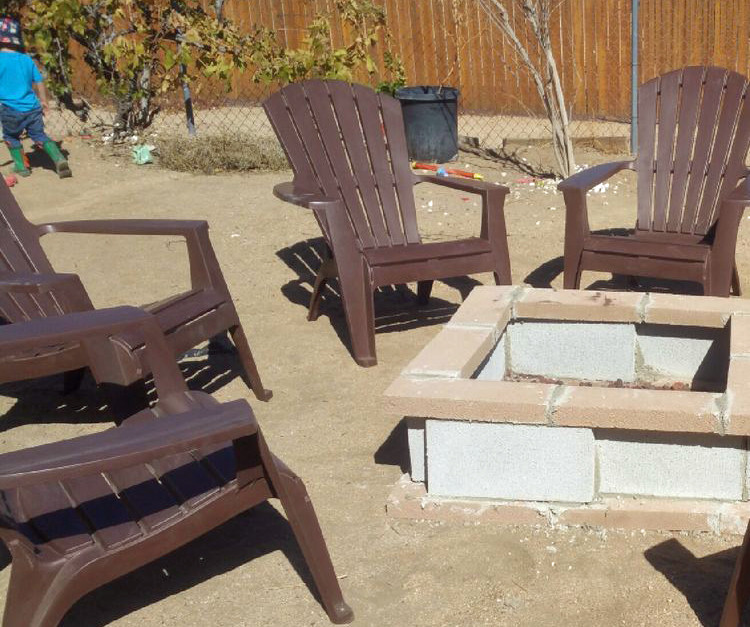
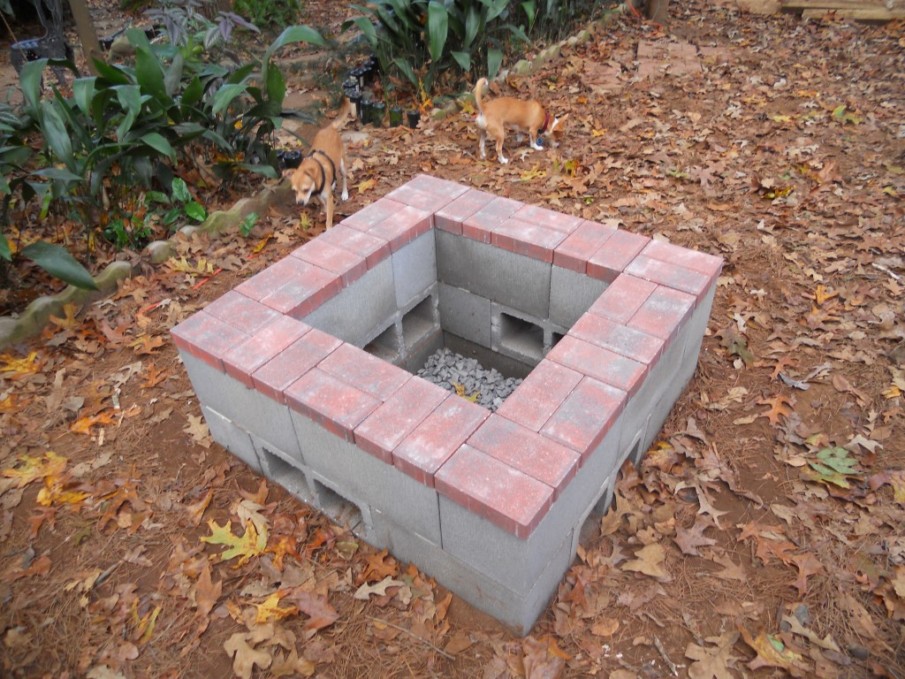
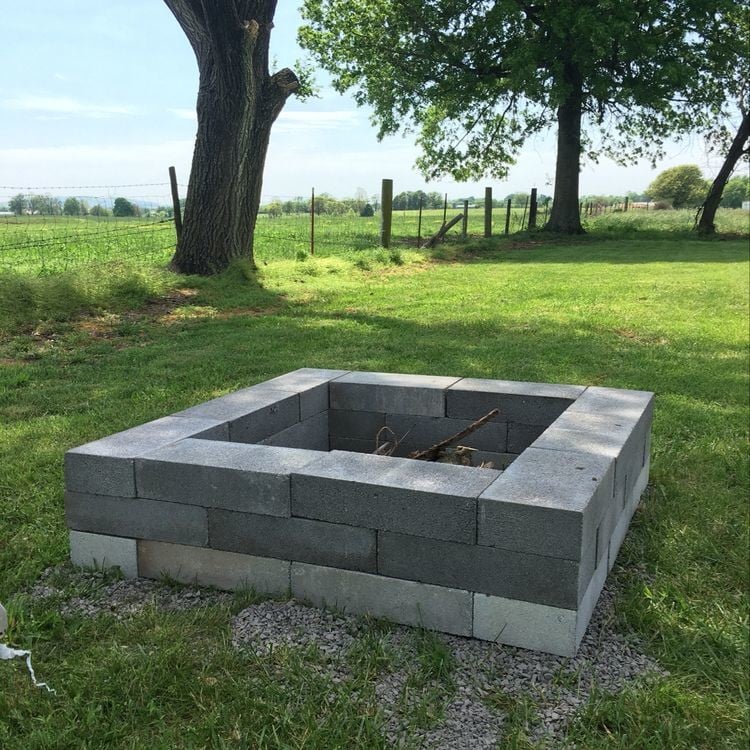
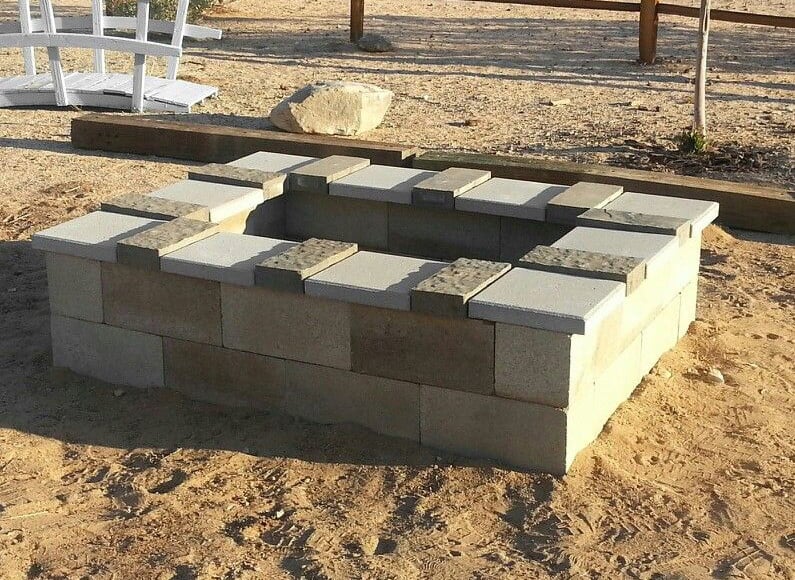
2. Cinder Block Fire Pit for just $40
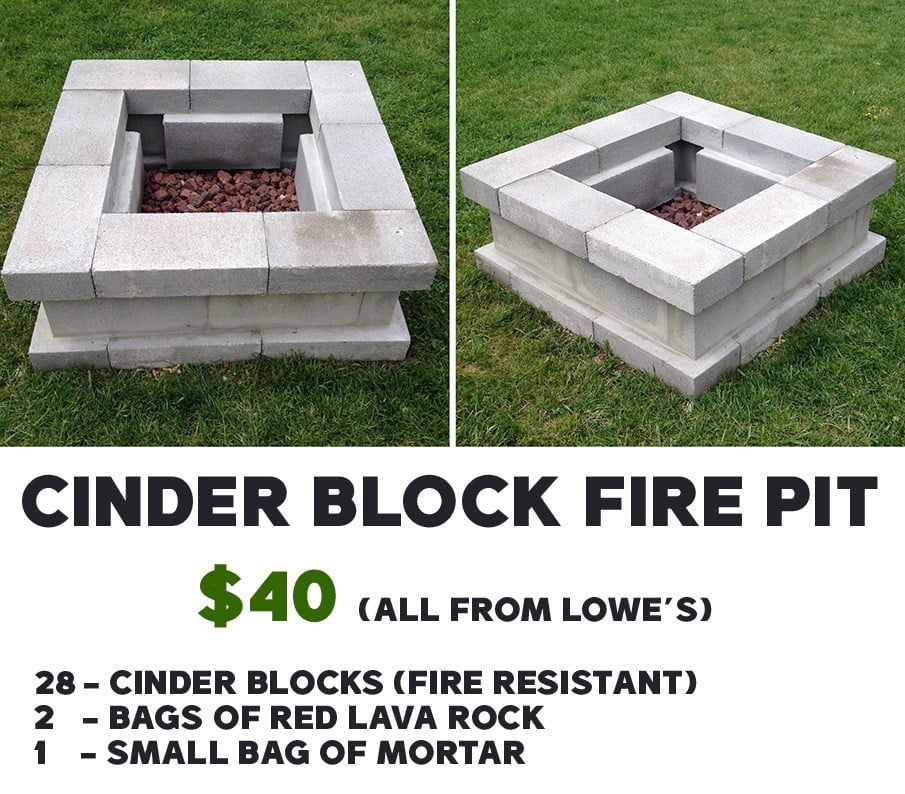
The original design and some guidance can be found here. The accompanying image says 24 blocks were used, but this appears to be an error. A total of 28 blocks are needed: eight for the base, eight for the top layer, eight for the outer frame, and four for the interior supports, one on each side. The project notes confirm this count.
The designer mentioned that all supplies were bought at Lowe’s and the project took about three hours to finish.
It’s a handsome square pit. The design uses fire-resistant concrete caps like the ones shown below. You can find more detailed instructions on how to build it.
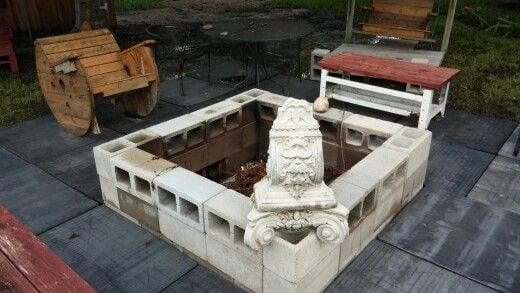
Below are examples of what other people created using the same instructions and photos, with some claiming they spent even less than $40. There are as many ideas as there are DIYers.
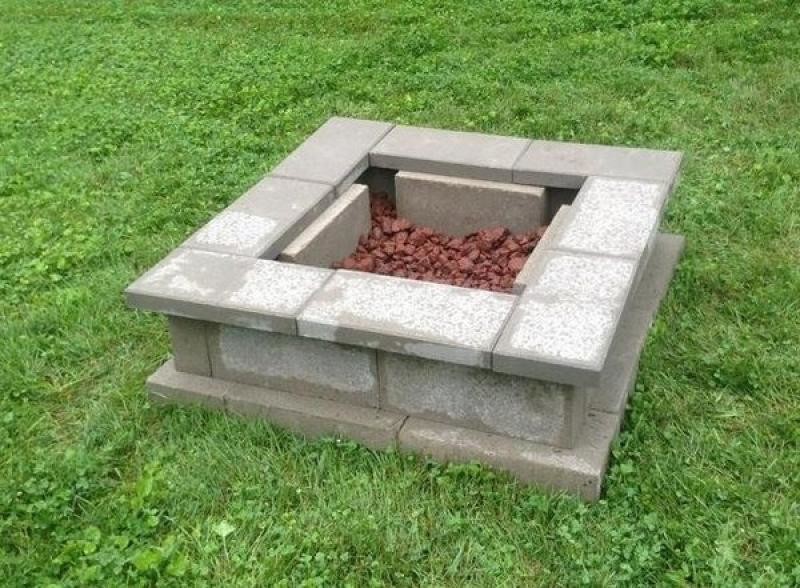
3. Easy Movable DIY Fire Pit By Dana Miller
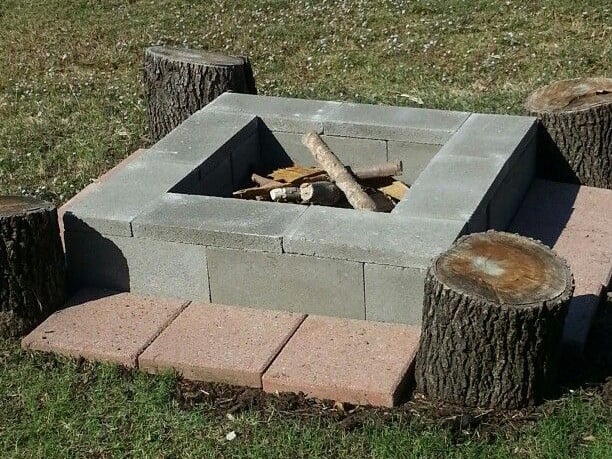
According to the designer, this fire pit plan requires eight cinder blocks ($1.45 each), eight cement caps ($.95 each), two bags of lava rock ($2.75 each), and optional 1-foot square pavers (around $3 each). The assembly is minimal, making this one of the fastest and cheapest plans available. Just level the ground, set the blocks, place the caps on top to cover the holes, fill the pit with lava rocks, add a few pavers, and you are finished.
25 More Design Ideas (plus Tips)
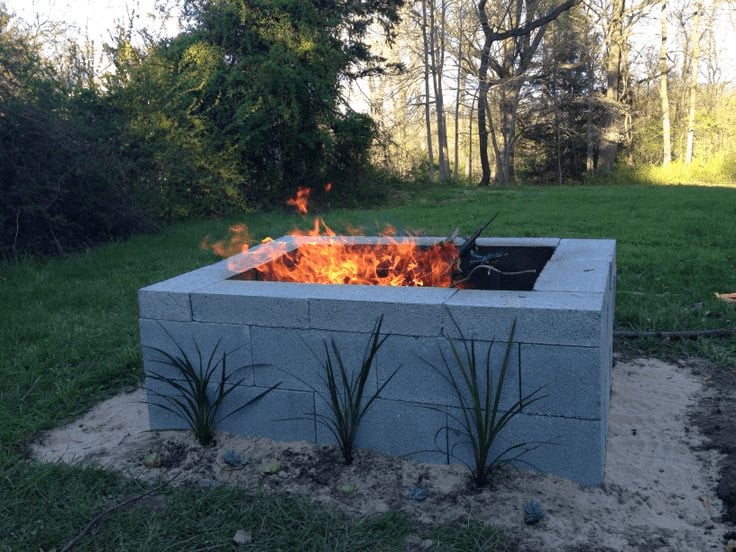
Many DIY enthusiasts believe that filling cinder blocks with gravel helps secure them and makes the entire structure more stable. This is a great, budget-friendly idea to strengthen your fire pit design and also helps keep water from collecting inside the blocks.
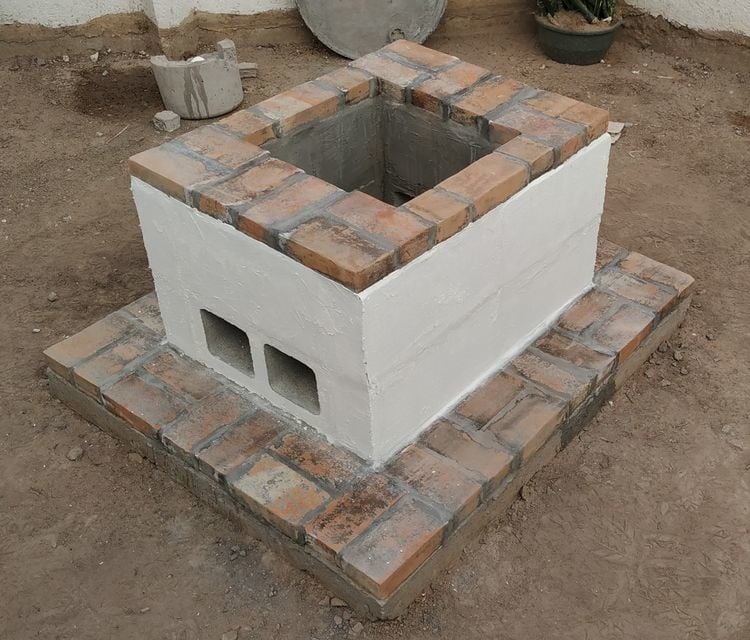
Below are a few more DIY plans and ideas that others have built using cinder blocks and paver bricks.
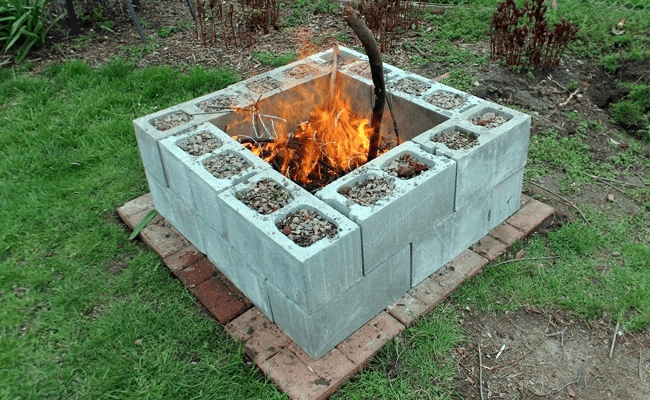
TIP: Use blocks with through-holes for the bottom layer to improve air intake and help the fire breathe.
TIP: Pour a layer of pebbles or landscape rocks on the bottom of the pit to reduce the heat’s direct impact on the concrete blocks.
The plan above is built entirely from concrete block caps. This is one of the most attractive designs seen so far, offering a quick and simple assembly with uniform bricks. Just use some gravel to level the ground, lay out the caps, and you’re good to go. Caps are only a few cents more than standard blocks, so the total cost difference is just a couple of dollars.
TIP: Overlapped blocks create a stronger structure and have more visual appeal, as seen in the image above.
A simple and cheap idea for a very cozy fire.
Here is another beautiful idea. This rectangular plan uses 20 concrete blocks and 10 caps.
This design uses skinny blocks on top to create an interesting, oversized fire pit.
A decorative idea is shown in the image above.
People love their fire pits.
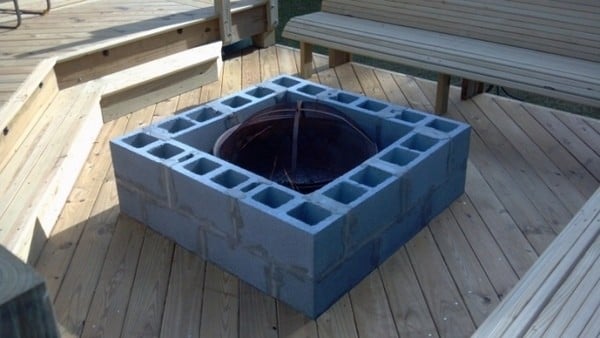
You can even install a fire pit on a wooden deck. Who would have thought? For added safety, it would be wise to build the bottom layer from blocks as well.
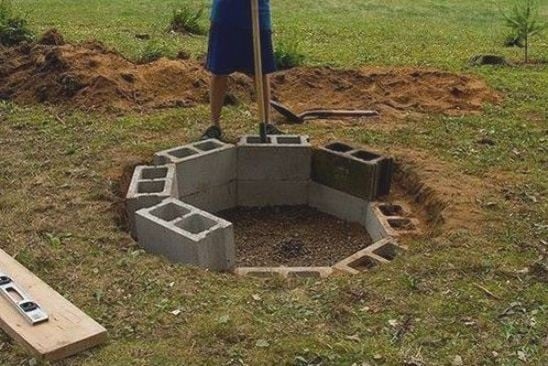
Building an inground cinder block fire pit is another fantastic idea.
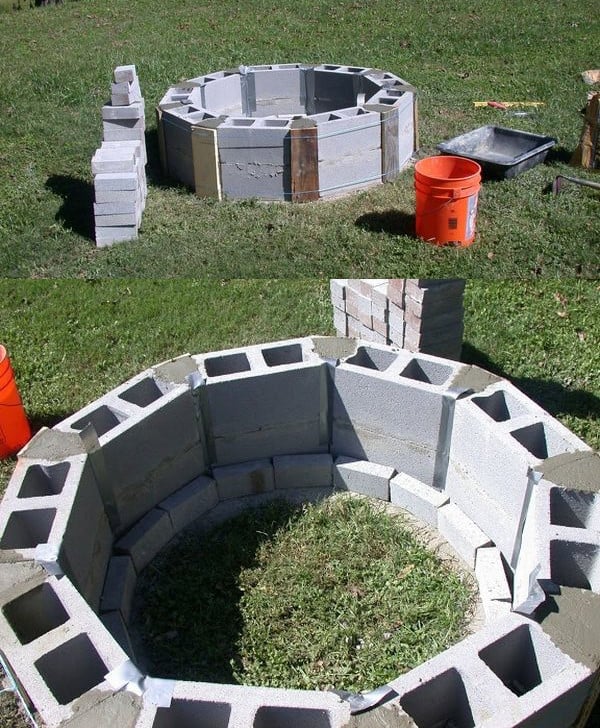
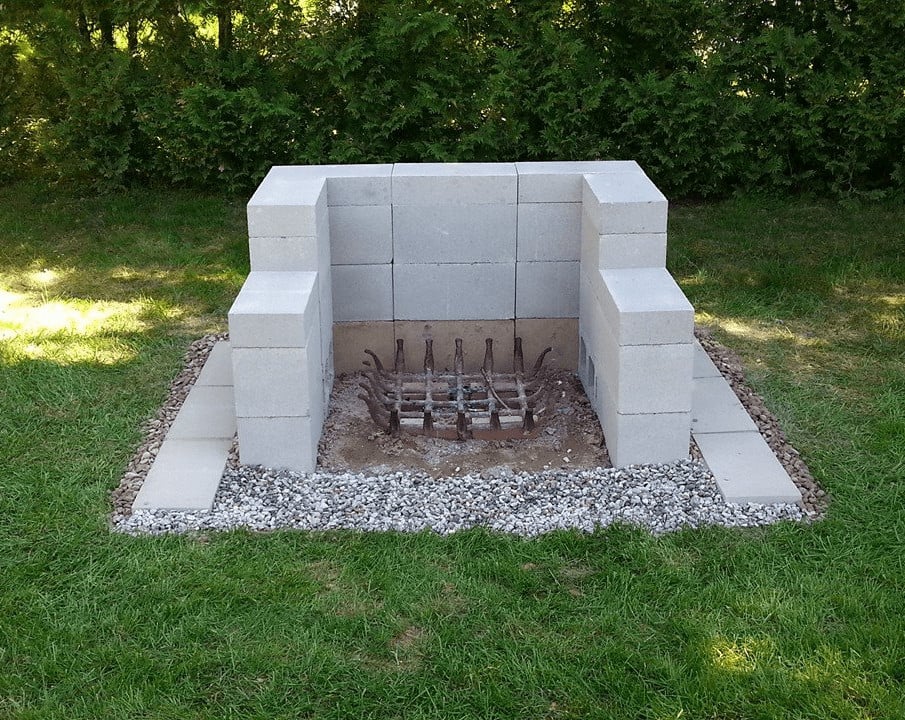
This round pit plan requires more labor and some cement to hold it together. The photo provides enough detail to see how it’s constructed. The use of metal wire and wood planks to form the raw concrete is quite clever.
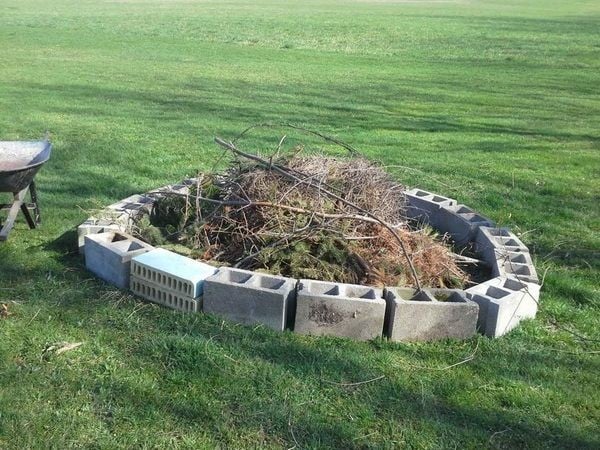
If you’re feeling lazy and have some blocks on hand, this could be the quickest fire pit you’ll ever assemble.
