
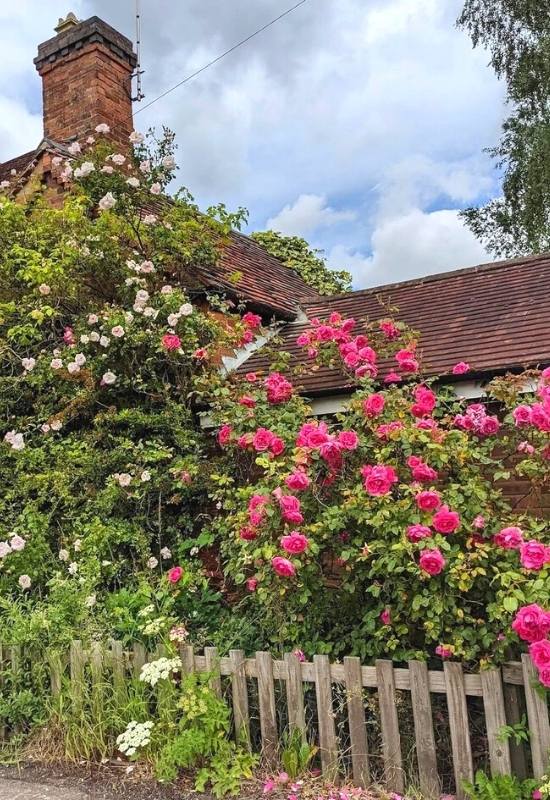
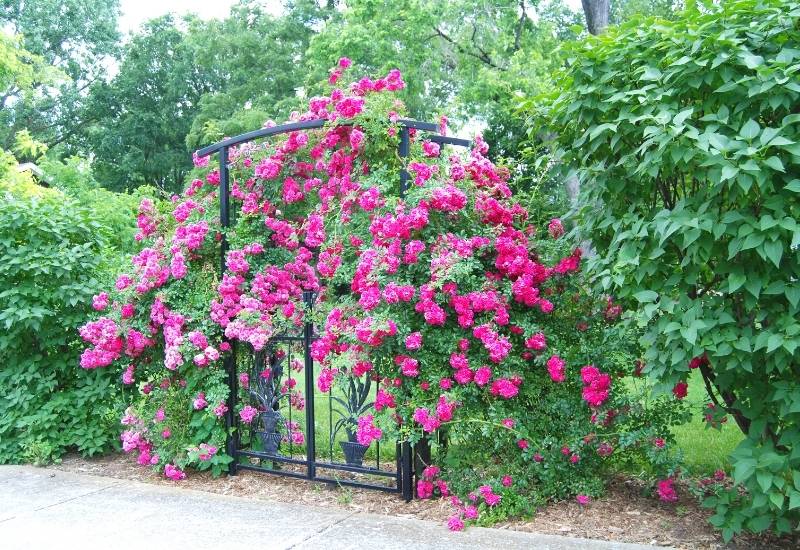
There’s something truly heavenly about a garden filled with fragrant, colorful roses, especially when they’re climbing over gates, gazebos, and pergolas. It’s easy to picture them in that perfect sunny spot, turning your yard into a private paradise. And it’s no wonder you want one now!
But let’s be honest: roses aren’t exactly low maintenance. They can be fussy, and climbing varieties are delicate plants that demand a lot of care. In return, however, they provide an incredible bounty of beautiful blooms. Success with climbing roses hinges on specific planting methods, proper support, careful pruning, and protection from pests and diseases. Rose gardening is a specialized craft, but with the right techniques, you can enjoy stunning flowers from May all the way through September.
This guide will walk you through everything you need to know to give your climbing roses the best possible care, ensuring they thrive and produce an abundance of flowers for years to come. These tips are guaranteed to help them grow strong and fill your summer with color.
Why Do Rose Climb?
Here’s the simple answer: roses don’t actually climb. That might sound strange, but these plants are technically shrubs, not true climbers. In the wild, some species, like bramble, have developed a growth habit of sprawling over other bushes. If you take a walk through a temperate countryside, you might spot dog roses or prairie roses arching over large shrubs to reach for the best sunlight.
These varieties grow exceptionally long stems that can be trained to “climb.” Unlike true climbers, they have no tendrils and don’t twine on their own, which means you need to attach them to a support structure like a trellis, fence, or gazebo. If you don’t provide support, their long, arching branches will simply grow out and fall back toward the ground. So, a climbing rose is really just a shrub that has learned to climb with a little help from you. And they do need quite a bit of that help and training to look their best.
The Do and Don’ts Of Planting a Climbing Rose
The happiness of your climbing rose comes down to three key factors: soil, sunlight, and location. Don’t underestimate this part. If you choose the wrong spot or soil, your rose will never be strong and healthy, no matter what you do later. You’ve surely seen roses that look sad and sickly, with small blooms, dried petals, and unhealthy leaves. More often than not, the problem is simply the wrong location.
First, let’s cover what to avoid. Never plant your rose in a spot that’s constantly wet, as this can lead to serious illness or even death. A shady location is also a no-go, since no rose can survive in full shade. Windy spots are another major issue. The wind can cause the rose’s own thorns to scar its stems as they bang against each other, a problem particularly for climbing varieties. Poorly drained soil is also a deal-breaker. Finally, avoid planting near a big tree, as roses dislike competing for resources and being overshadowed. A north-facing position often combines all these disadvantages. Also, keep them away from the seaside, as these flowering plants can’t tolerate salt.
Now for what you should do. Plant your rose in a dry, well-ventilated location to keep the air around it healthy. Make sure the spot is well-drained. If you have clay soil, you’ll need to improve its drainage before planting by adding gravel and sand, and continue to do so year after year. Most climbing roses crave a full-sun position, though some varieties will tolerate partial shade. A sheltered spot is also ideal, especially if you live in a windy area. Finding the perfect place isn’t always easy, but getting it right gives your flowering climber a fantastic start in life.
Where to Plant a Climbing Rose
Roses are picky but can adapt to different soil types. They thrive in loamy soil but can also grow in clay, sand, and even chalk-based soils. In fact, they can do quite well in clay soil as long as it’s rich and well-drained. This adaptability makes them seem easygoing, but there’s a catch.
The soil must be balanced. Your rose won’t grow in heavy clay, hard chalk, or very sandy conditions. If your garden has one of these, you’ll need to improve the soil first. Roses also require rich soil, meaning it should be full of organic matter and nutrients. Of course, excellent drainage is non-negotiable. The ideal pH for roses is between 6.0 and 6.5, which is mildly acidic. Neutral is acceptable, but anything more than mildly alkaline can cause problems. If your soil’s pH is above 7.5, you’ll need to lower it. Soil that is too acidic, below 6.0, is also bad because it blocks access to essential nutrients like potassium, nitrogen, and phosphorus.
Simply put, the soil pH for roses can range from mildly acidic to mildly alkaline, with a sweet spot between 6.0 and 6.5. If you’re an organic gardener, you know that roses love healthy, living soil full of beneficial bacteria, mycorrhizae, and small creatures like worms that work the soil for you. With the “where” figured out, it’s time to move on to “when.”
When to Plant Your Climbing Rose
While you can find roses at garden centers year-round, that doesn’t mean you can plant them anytime. If you buy a potted rose in the winter, for example, you’ll need to keep it sheltered in its container until spring arrives. The best time to plant climbing roses is in the fall, long before the first frost. This gives the plant time to settle in before temperatures drop to freezing. If you plant in the fall, be sure to apply a generous layer of mulch to keep the roots warm through their first winter.
You can also plant roses in the spring, but wait until all danger of frost has passed. Spring-planted roses will be a bit behind those planted in the fall. A rose planted in autumn will start growing early in the spring, while one planted in spring will focus on establishing its root system before putting out new branches and may not even bloom for a few months.
Planting roses in summer is not ideal, but it can be done in an emergency. Be extra careful if the weather is hot, as most roses are not heat-tolerant. Planting during a heatwave in a warm region can cause massive stress to your rose. As for winter, it’s best to forget it in most areas. If there’s any risk of frost, you could lose your plant entirely. Now that you know “when,” it’s time to tackle “how.”
How to Choose a Climbing Rose to Plant
Besides picking a variety you love, it’s crucial to select a healthy plant. Check to make sure the plant is free of disease. The leaves are a great indicator of a plant’s health, so inspect them closely. The “trunk” should be woody and strong but also short. Look for vigorous and healthy stems that are growing fast, large, and long.
Grafted roses are typically stronger. These plants are created by grafting the desired flowering variety, known as the scion, onto a hardy, vigorous rootstock from a different rose. The rootstock provides energy to the often weaker scion, resulting in a super-strong plant. These roses usually cost more, often starting around $20. Once you’ve chosen a good rose, you’re ready to learn how to plant it.
How to Plant a Climbing Rose
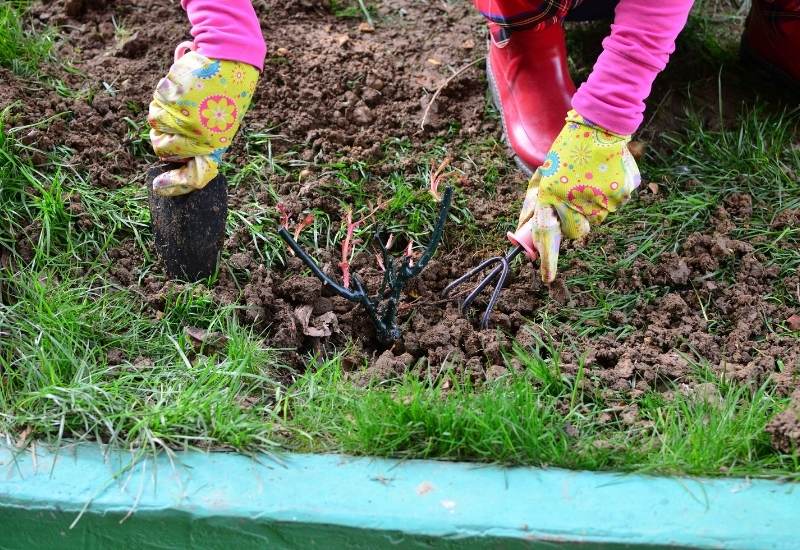
When you plant a rose, your job is to give it a comfortable new home. This means ensuring the soil is fertile and well-drained. Start by looking at the size of the container your rose came in. Dig a hole that is twice as deep and twice as wide as the container. At the bottom of the hole, add some long-lasting organic matter. Roses can live for decades, so they need a reserve of food. An old but effective secret is to use bird feathers. They decompose very slowly, are not overly active like fresh manure, and are incredibly nutritious.
Use this bottom layer to improve drainage as well by adding pebbles, gravel, or other draining materials. Then, add a layer of soil mixed with coarse, well-rotted compost. Make sure the compost is not still decomposing, as this could burn your plant’s roots. Now the home is ready. Carefully remove the rose from its container, keeping the soil around the roots intact. Spray the roots with water and gently tease some of them out. This helps the roots adapt to the new soil. Place the rose in the hole, adding a few inches of coarse sand for the roots to rest on for extra drainage and hygiene. Fill the hole with your soil, drainage, and compost mix, making sure to cover the original pot’s soil with about an inch of the new soil. Gently but firmly press the soil down around the rose with your feet and water it abundantly.
Always plant your rose in the evening, not in the morning or when the sun is high. This gives your climber time to rest and settle in overnight. In the following days, check that the soil is firm but not compacted. If it sinks too much, add more of your soil mix. Finally, mulch generously once the soil has settled, usually within a week. This helps keep the underground climate stable, which is just what the roots need to establish themselves.
How to Take Care of Climbing Roses
As you can see, planting a rose is a specialized job, and so is growing one. Let’s dive into what comes next.
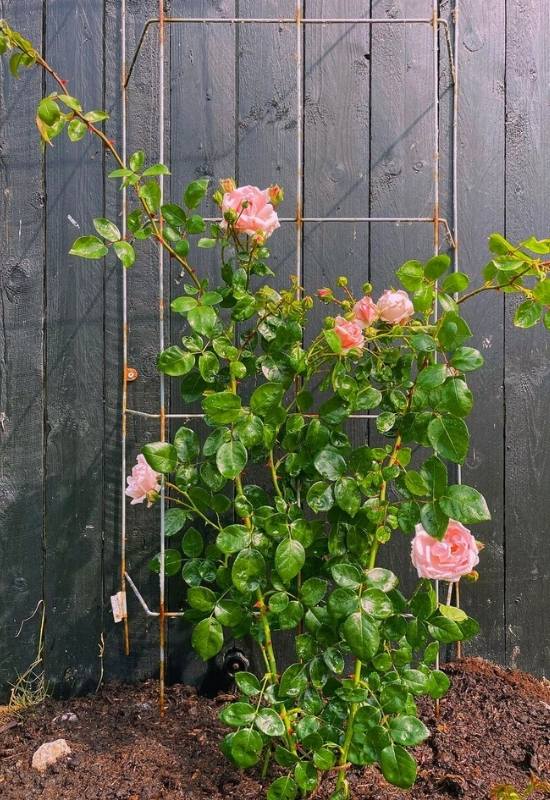
Provide Strong Support From The Very Beginning
The first thing to do is plan and build a support for your rose to climb, and it must be strong and durable. Roses are incredibly heavy and can live for decades. You won’t be able to change the support once the rose is growing without cutting it back completely. So, if you use wood, make sure it’s treated and long-lasting. Iron will rust unless it’s properly treated. Even concrete isn’t always that durable.
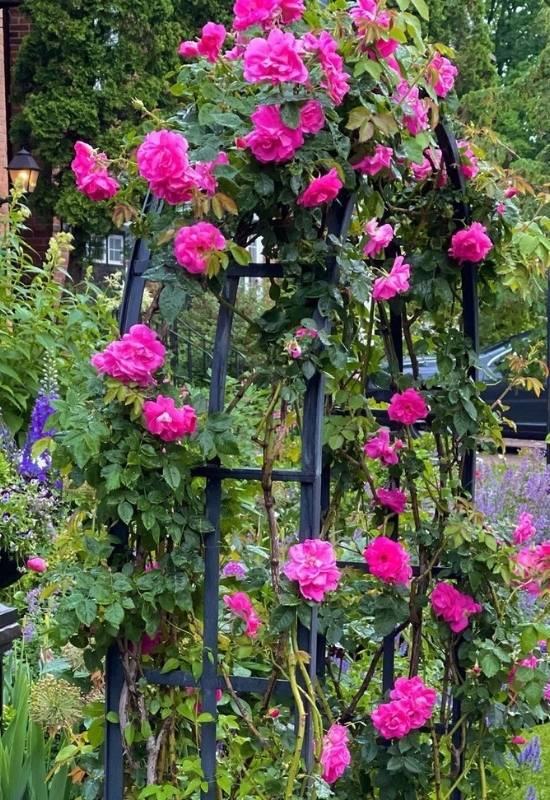
Make sure the support is steady in the ground by planting it deep. How you do this depends on your situation. If you’re setting wood posts in the ground, they need to be sealed with something like pitch to prevent rot. Some people even set the posts in concrete for extra stability. Loamy and sandy soils require more depth than clay soil. The type of support you choose depends on your style and needs, whether it’s a trellis, pergola, arbor, gazebo, gate, fence, or porch. Keep in mind that not all climbing roses are suitable for columns; they need to have long, flexible stems. Check the plant description to be sure. Finally, place the support very close to the rose, no more than one foot away.
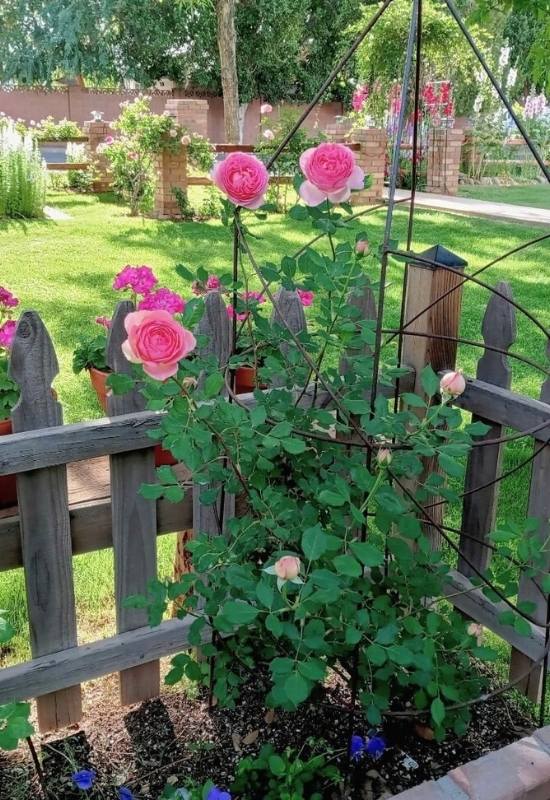
Train Your Climbing Rose Plant On Structures
Your rose will need a little encouragement to climb. Natural climbers find support on their own and cling to it or wind around it, but roses can’t “see” the support. You have to show it to them. Take a chosen branch, lead it to the support, and gently fasten it. Plastic zip ties are perfect for this because they are durable, won’t rot, and won’t rust. Avoid wire, as it can damage the rose stem.
Most importantly, keep the fastening very loose and large, about 4 or 5 inches in diameter. This allows room for the stem to grow, otherwise you’ll end up cutting into it.
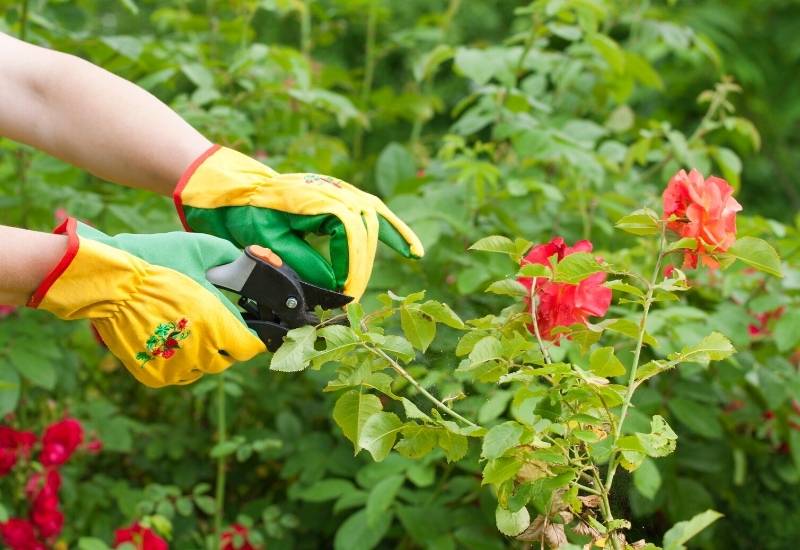
Shape Your Climbing Rose
You get to decide what your climbing rose will look like, and you’ll have plenty of branches to work with. In the world of climbing roses, “branches” are called “canes.” There are main canes, which grow from the base of the plant, and lateral or secondary canes, which grow from the main ones. If you leave all the main canes, you’ll get a thick, dense rose that forms a “green wall” of flowers.
However, you might prefer a lighter, more open effect. In that case, you’ll want to select a few main canes and prune the others from the base. Even if you want a full “green wall,” you may still have too many main canes. In either case, always choose the strongest, healthiest, and most vigorous canes. You will attach these main canes to the support and leave the secondary ones free. This allows you to determine the overall shape of the rose. You can make it arch, zig-zag, or even have the canes intersect. Try to let the main canes grow without deadheading them, as that would stop their growth. As the rose gets bigger, it can be hard to tell the main canes from the lateral ones, so it’s a good idea to mark your main canes with colored, loosely tied ribbons.
Know When to Prune Your Climbing Rose
Gardeners have a saying: “Prune your climbing roses when forsythia is in bloom.” It’s an excellent rule of thumb. In general, you should prune roses in early spring, just before the new buds start to grow but while they are still dormant. This is the main pruning, where you shape the plant for the year and beyond.
You can cut any dry, dead, or sick canes and branches at any time. In fact, you should keep an eye out for them. It’s a good idea to clean off all sick material in the fall. Dry stems might not be a problem, but sick ones can spread disease and block ventilation. Deadheading is different from pruning, and you’ll do that after the flowers are spent.
How to Prune a Climbing Rose
Pruning a climbing rose is different from pruning a shrub rose. With a shrub rose, you want to keep a few low, woody branches and encourage new ones to grow out, like a basket. This isn’t the case with a climbing rose. The most important pruning is the first one, the “shaping,” where you choose which main canes to keep. Unlike with a shrub rose, where you can cut back the main branches each year, for a climbing rose, these canes need to keep growing. So once you choose them, it’s for the life of the plant.
You should only cut a main cane if it’s seriously ill, if you want it to branch off into two new main ones to create a more complex shape, or if it’s becoming a problem for the other canes by rubbing against them or making the plant too thick. All other pruning is done to the secondary, or lateral, canes. For these, cut all dead, dry, and sick canes, as well as any that interfere with others you want to keep. Over time, you’ll find yourself cutting off the older, lower lateral canes. You can then select higher lateral canes to arch down and cover the empty spaces if you want your blooms to start low on the plant.
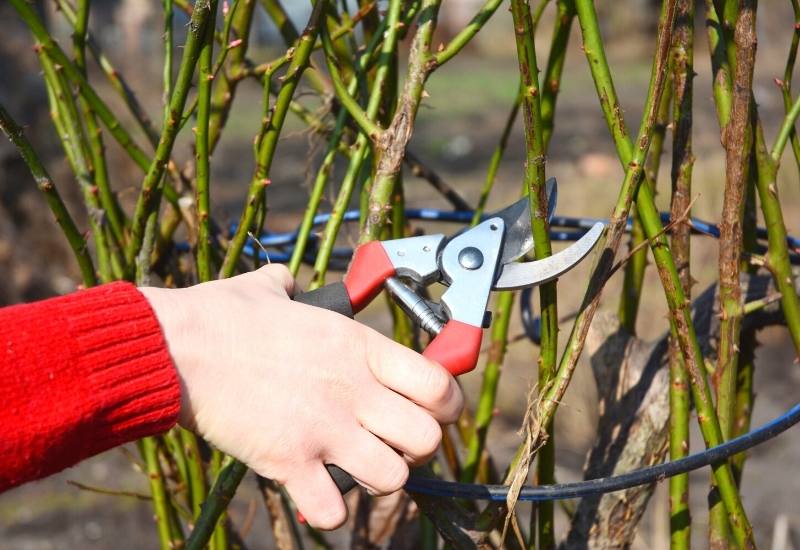
Safety Measures to Prune a Climbing Rose
Pruning can be a source of danger and disease for plants, especially roses. Always disinfect your blades before moving from one plant to another, even if they are all roses, to prevent the spread of germs. Use sharp blades to avoid causing damage, and always make a neat, smooth cut to create a barrier against pathogens. A rough cut can collect water and cause rot. While some gardeners debate the necessity of cutting at an angle, it can help water run away from the nearest bud. Make your cut about an inch from the bud. And don’t forget your own safety: wear gloves because roses have thorns!
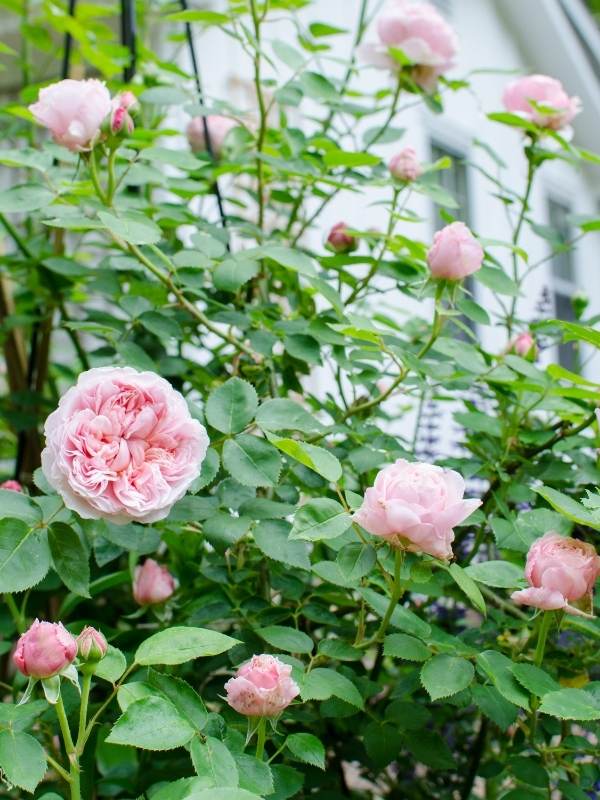
Deadhead a Climbing Rose To Encourage More Flowers Later
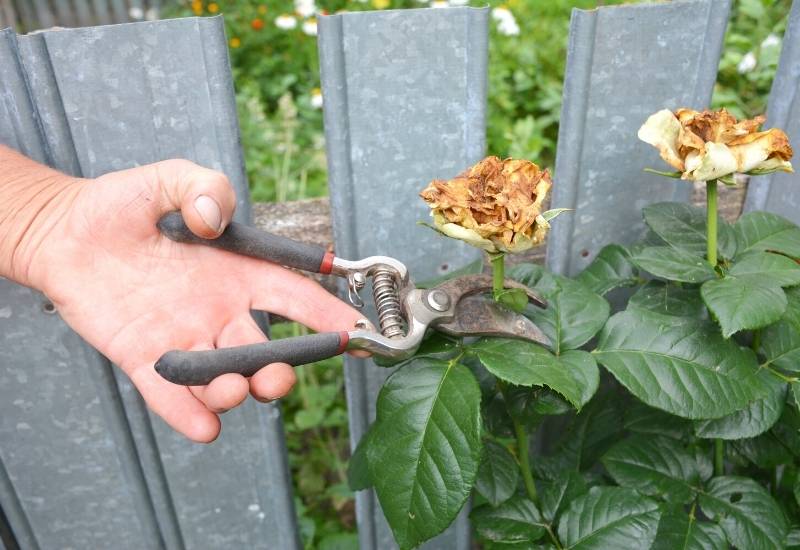
Climbing roses will bloom repeatedly from May to September only if you deadhead the spent flowers. First, sterilize your blade. Then, look down from the spent bloom and find the first leaf with five leaflets, not three. This is the secret. If you cut above a three-leaflet leaf, the stem will dry up and die. If you cut above a five-leaflet one, it will survive and produce new blooms. This small detail can make all the difference between a rose that blooms all season and one that looks sad and empty.
Cut at an angle about one inch above the leaf. As you do this, you can also influence which way the new shoot will grow, as it will develop in the direction of the leaf you’ve selected. Rose leaves are alternate, not opposite, so one goes one way and the next goes the other. If the first leaf with five leaflets is pointing in the wrong direction, just choose the next one down, and it will go the other way.
How to Water Climbing Roses
Roses need plenty of water, especially in the summer. You’ll need to water them regularly and abundantly to help them tolerate the heat. In the winter, you can suspend watering if you live in a region with wet winters. From spring to fall, a rose may need 4 to 5 gallons of water a week, but this is a rough estimate that depends on your climate. Use your judgment. If your winters are dry, give them an occasional watering, but don’t overdo it.
Never overwater or leave the soil waterlogged. Also, avoid letting pockets of water form near the base of the rose, as this can cause the plant to rot, especially in the cooler months. Don’t water if you expect frost, as the water could freeze underground and damage your plant. In winter, roses are dormant and only need a tiny bit of water.
When to Feed a Climbing Rose
Feed your climbing rose regularly. In a perfectly healthy garden with rich soil, you might only need to feed your rose once a year, if at all. But most gardens aren’t at that stage. For most, there are some important feeding times you shouldn’t miss. Feed your rose abundantly in early spring when it wakes up from dormancy and is very hungry. It needs a lot of energy to grow new shoots. Feed it again after the first bloom to give it energy for a repeat performance. In the fall, after the last bloom, give your rose a slow-release fertilizer to store away energy for the cold months.
The “on average” rule you’ll find on plant guidelines suggests feeding your rose once a month in spring and every two to three weeks in summer. Then, gradually decrease feeding in the fall after the last bloom and stop by winter. This gives you a general idea, but you should adjust based on your soil’s fertility.
How and What to Feed Your Climbing Roses
Always use an organic fertilizer. Any complete, rich, and fully mature compost-based fertilizer is great for routine feeding. If your plant is stressed or looks like it’s starving, you can use an organic liquid fertilizer like nettle water for a quick boost. Some amateurs swear by used coffee grounds and banana peels scattered on the ground.
If you don’t have a compost heap, I suggest using a rose-specific organic fertilizer. The NPK ratio for roses is usually 4-6-4 or 4-8-4. Phosphorus-rich fertilizers can help if your blooms are disappointing, as this element boosts flowering. Finally, don’t forget to give the dried leaves back to the rose. When leaves drop, they are meant to feed the soil, and a plant’s own dry leaves are the best way to give it what it needs.
Climbing Roses and Disease
Roses are prone to disease, whether they are climbers or shrubs. Don’t panic if your rose shows some signs of illness; it’s very common, and in many cases, your plant will manage just fine. Take a walk around your neighborhood, and you’ll likely find it hard to see a single rose with no disease at all. The problem arises when an ailment gets out of control or when several issues occur at the same time. But don’t beat yourself up if this happens; even professionals deal with it.
Always Check the Leaves of Your Rose!
Rose leaves get sick very easily and are a key indicator of the plant’s overall health. Some leaf disease is normal, even expected, but keep an eye on it. If it starts to increase, your green companion is getting worse.
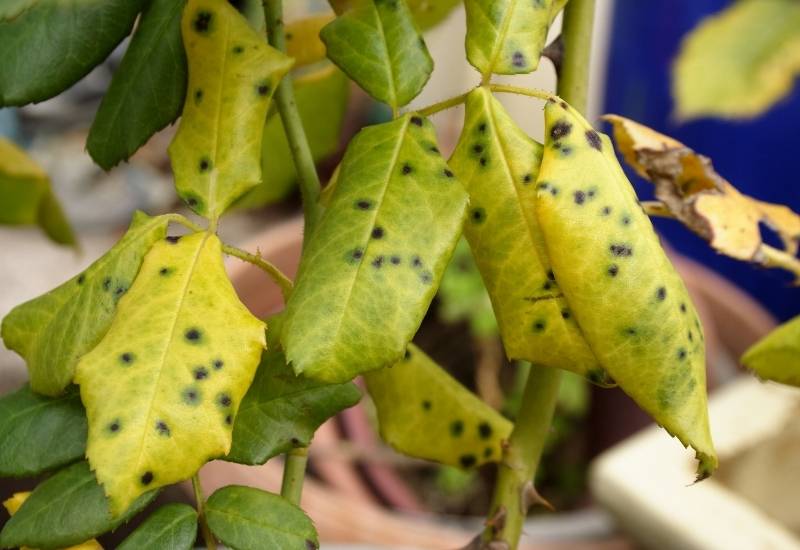
Rose Leaf Spot and How to Treat It
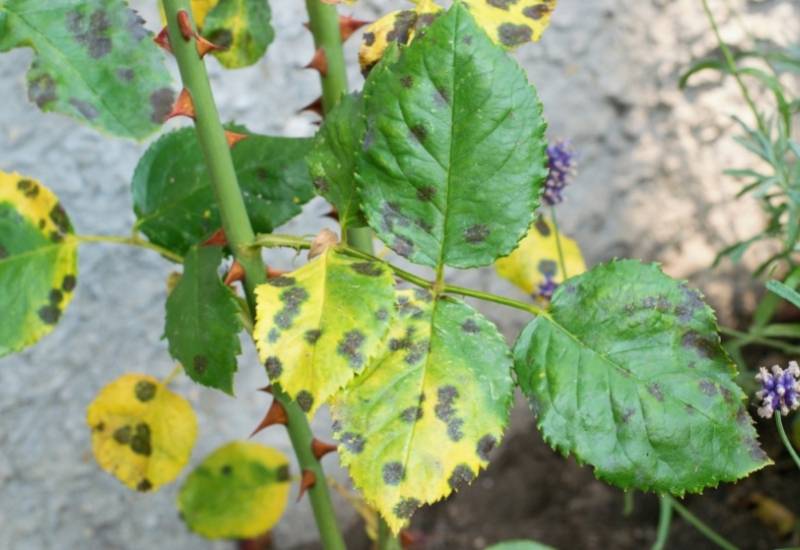
Rose leaf spot is caused by a fungus and is very common. You’ll notice it as dark, almost black spots on the leaves, which then turn yellow and die. If it gets bad, it can be a serious problem for your rose. The cause is often excessive humidity and lack of ventilation. To treat it, spray the leaves with neem oil in the evening, as it can burn the leaves in the sun. You may also want to prune the rose to improve air circulation.
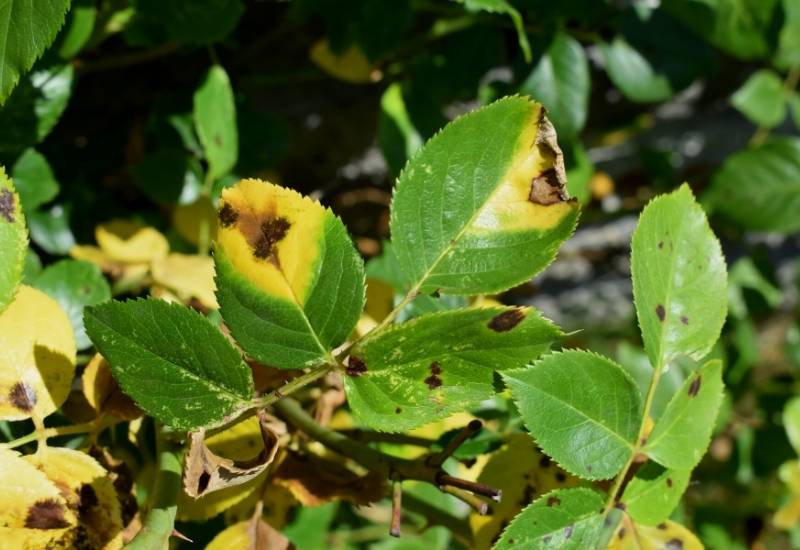
Rose Rust and How to Treat It
Rose rust is another common leaf problem that appears as red, rust-like spots. It’s not as serious as rose leaf spot and is very common, especially in spring and summer. The leaves will eventually drop, but the plant won’t suffer excessively. To treat it, spray the plant with neem oil in the evenings and repeat as necessary.
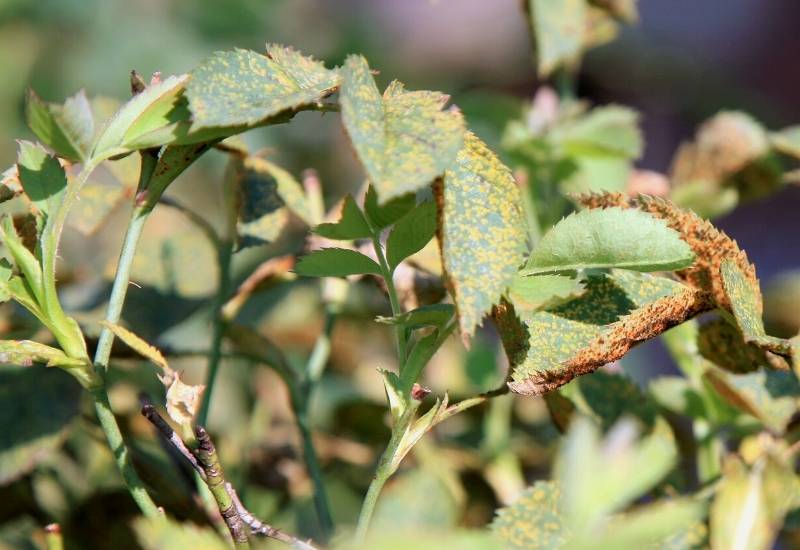
Powdery Mildew and How to Treat It
Powdery mildew shows up as a white powder on leaves, stems, and sometimes even the flowers. It’s caused by a fungus and is common in wet summer and fall weather. You can treat it by spraying the plant with neem oil in the evenings. You’ll also want to prune any excessively affected branches.
Rose Leaf Spot, Rose Rust and Powdery Mildew: How to Stop Them Spreading
You’ll notice that these fungal diseases can stick around in your garden for years. To stop them from spreading, collect all the affected leaves and branches you’ve pruned and burn them. If you leave them on the ground or put them in the compost heap, they will release spores and re-infect your prized climbers.
Green Flies (Aphids) and How to Treat Them
Aphids, or green flies, love roses. A few won’t do much harm, but they reproduce quickly and can weaken your rose when their numbers grow, leading to fewer blooms and slower growth. You’ll know things are bad when you see the flower heads packed with them and bending over because the aphids are sucking out so much sap. Ladybugs and other beetles are natural predators that can help control them. In the meantime, you can make a spray by macerating garlic cloves and a few chili peppers in water for 48 hours. Spray your roses abundantly, repeating every two weeks and after it rains. The smell will disappear within a day, leaving your roses as fragrant as ever.
Rose Stem Canker and How to Treat It
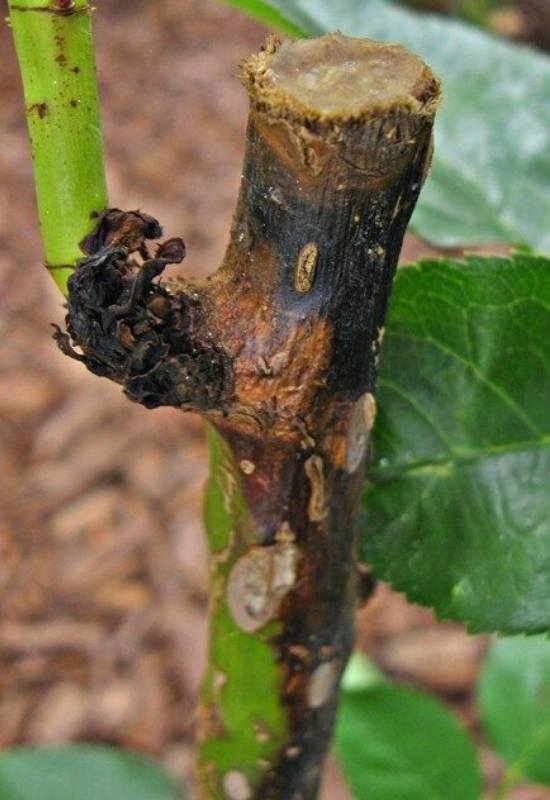
Rose stem canker appears as black or very dark brown stems. It’s caused by a fungus that enters the plant through cuts from pruning or breakage. To treat it, use sterile blades to remove the entire affected part, cutting past the diseased area. Then, spray neem oil on the wound to stop it from spreading and burn the diseased parts.
Rose Cane Scarring and How to Treat It
Rose cane scarring is common and shows up as brownish-gray scars along the canes. While not threatening on its own, it can weaken the plant and create entry points for pathogens. It’s caused by the rose’s own thorns when canes rub against each other in the wind. To avoid this, prune your rose so the canes don’t touch and fasten them carefully to their support. If a cane is severely damaged, cut it off. For extra safety, you can spray a natural fungicide like neem oil over badly affected plants.
Now You Are a Real Climbing Rose Expert!
There is a lot to learn about climbing roses, and now you can see that it’s a whole trade, a discipline, or even an art! Thank you for sticking with it, and hopefully, you’ve learned a lot. You might not remember everything right now, but you can always bookmark this page for help whenever you need it.